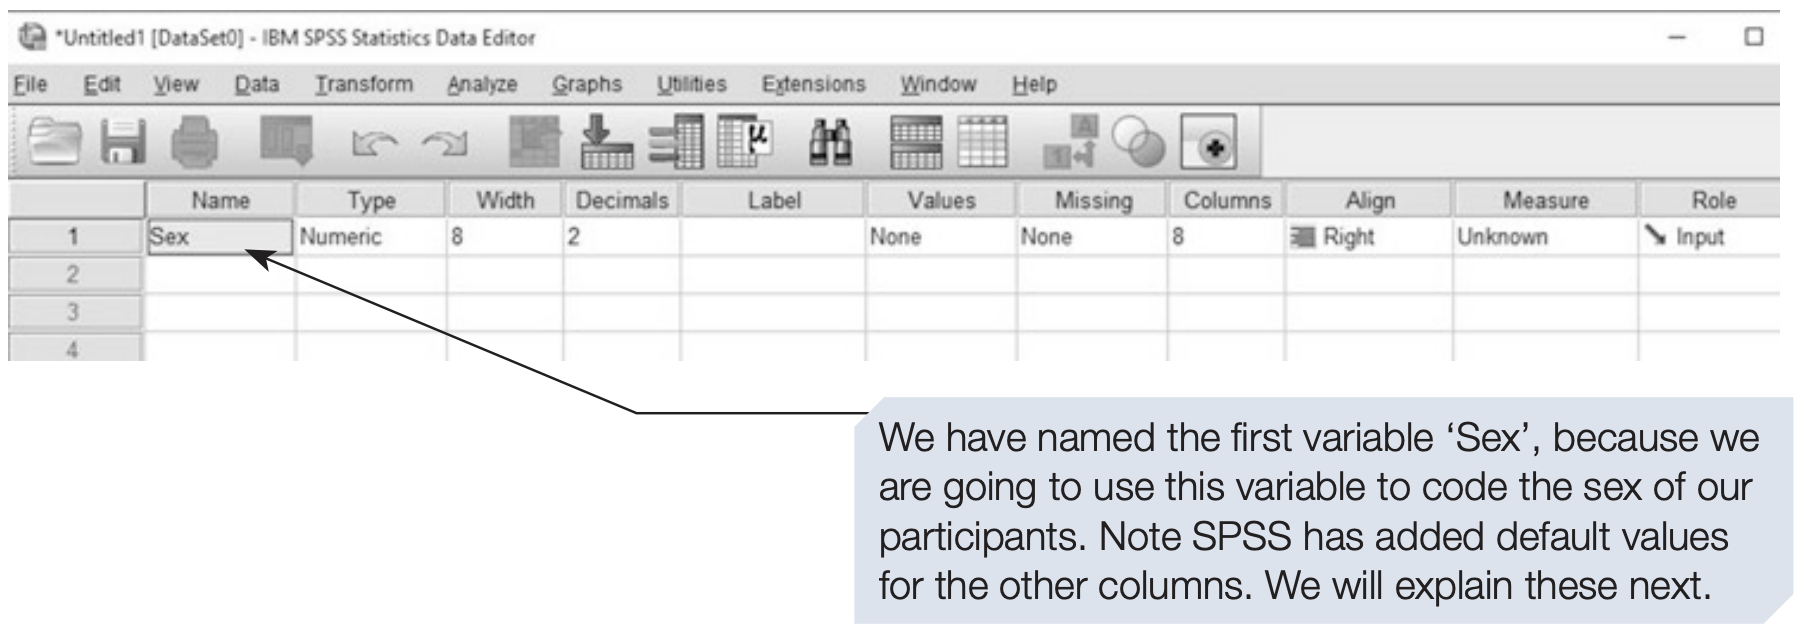
2.1 Data Entry in SPSS
(PSY206) Data Management and Analysis
1. Data Entry Preparation
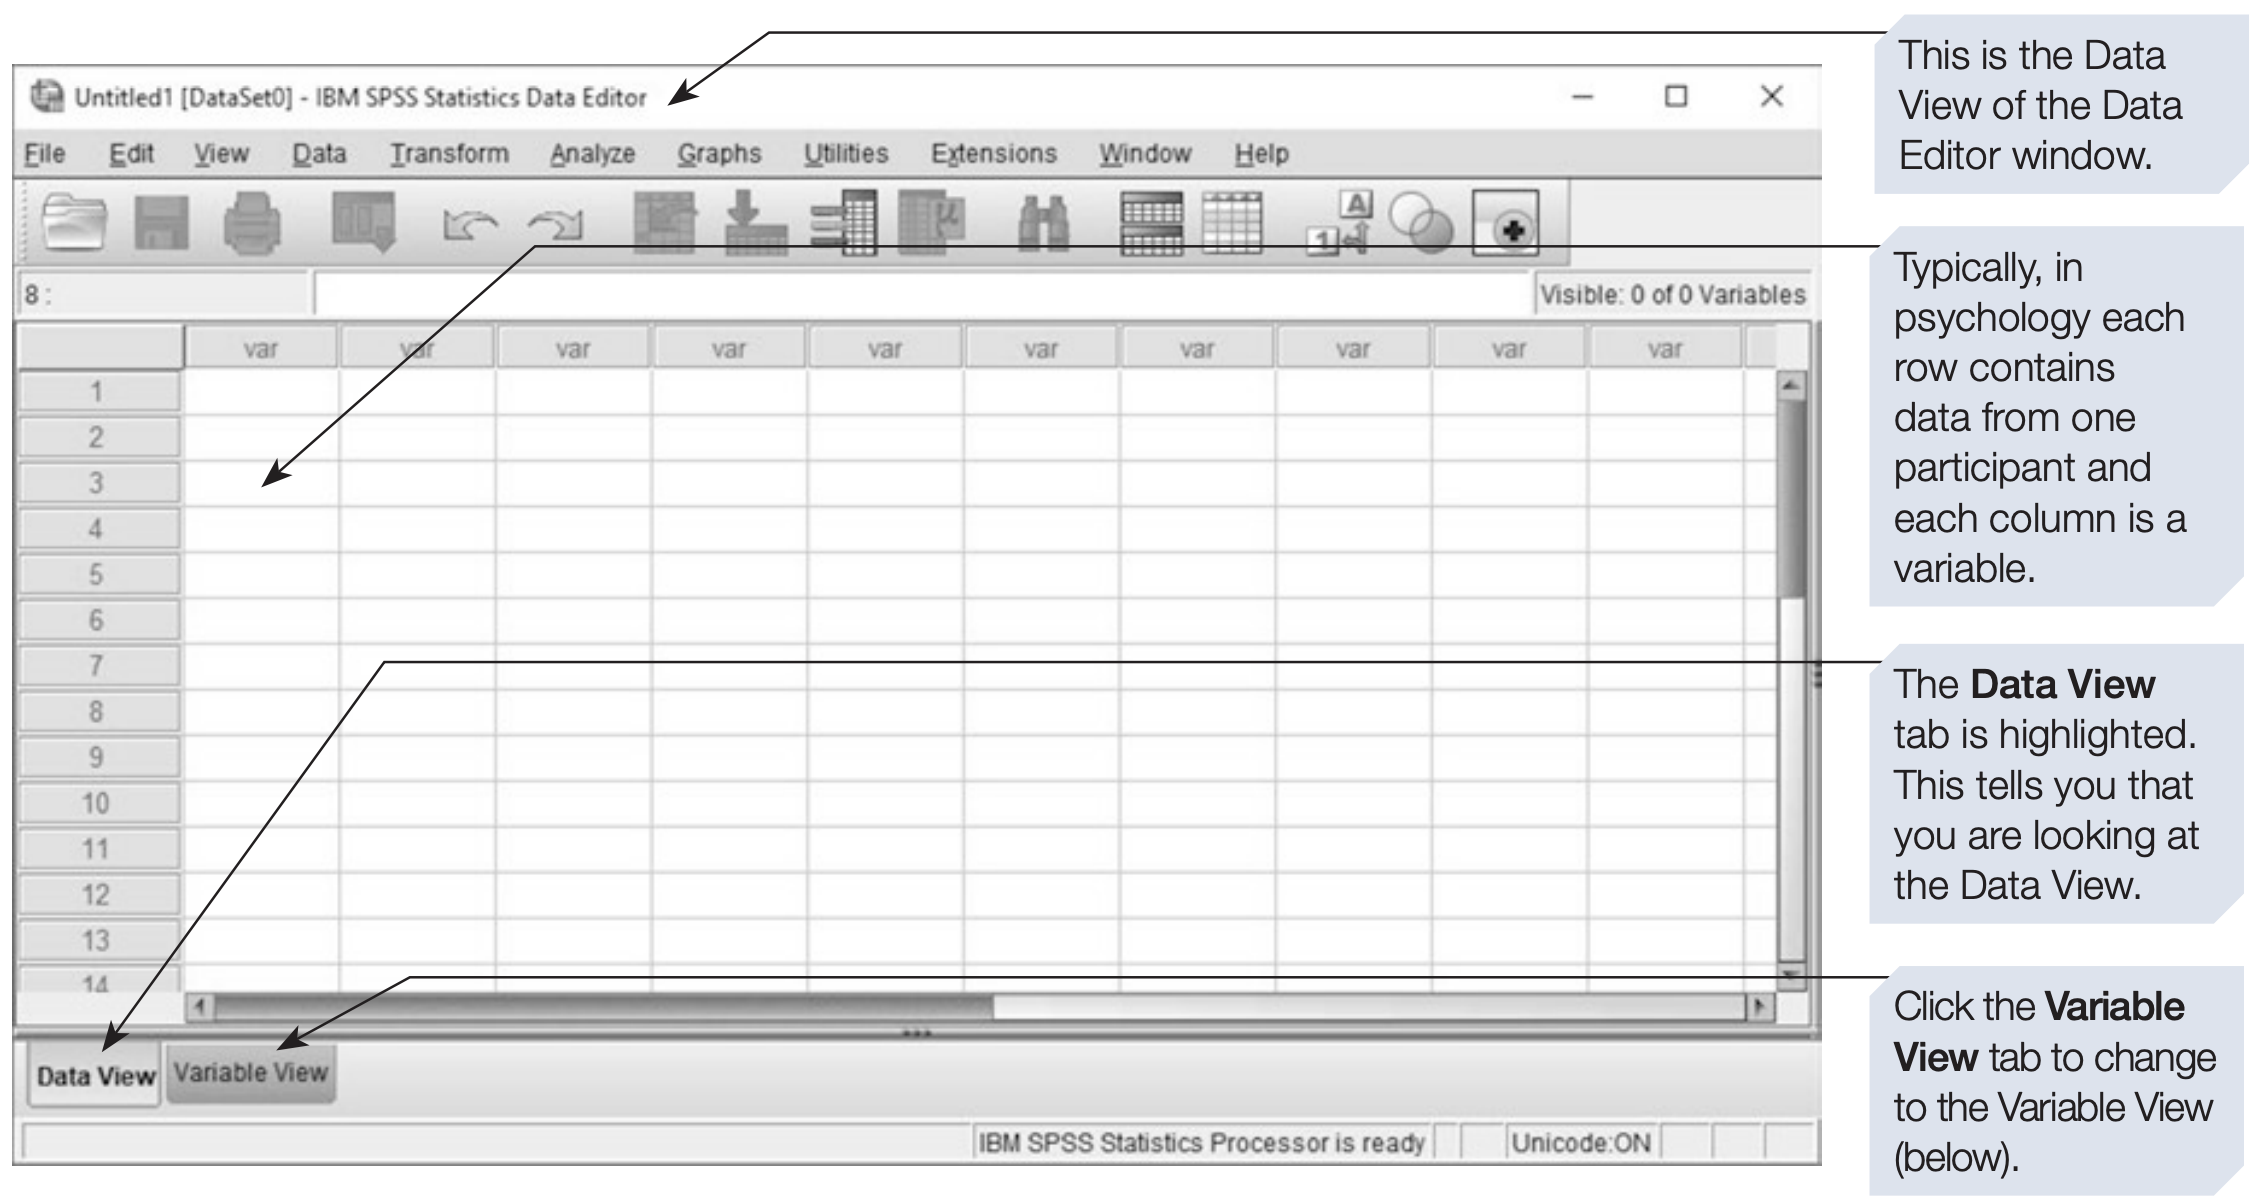
- The SPSS Data Editor has two views:
- Data View – displays the dataset in spreadsheet form.
- Variable View – used to define variables, types, labels, and formats.
- Data View – displays the dataset in spreadsheet form.
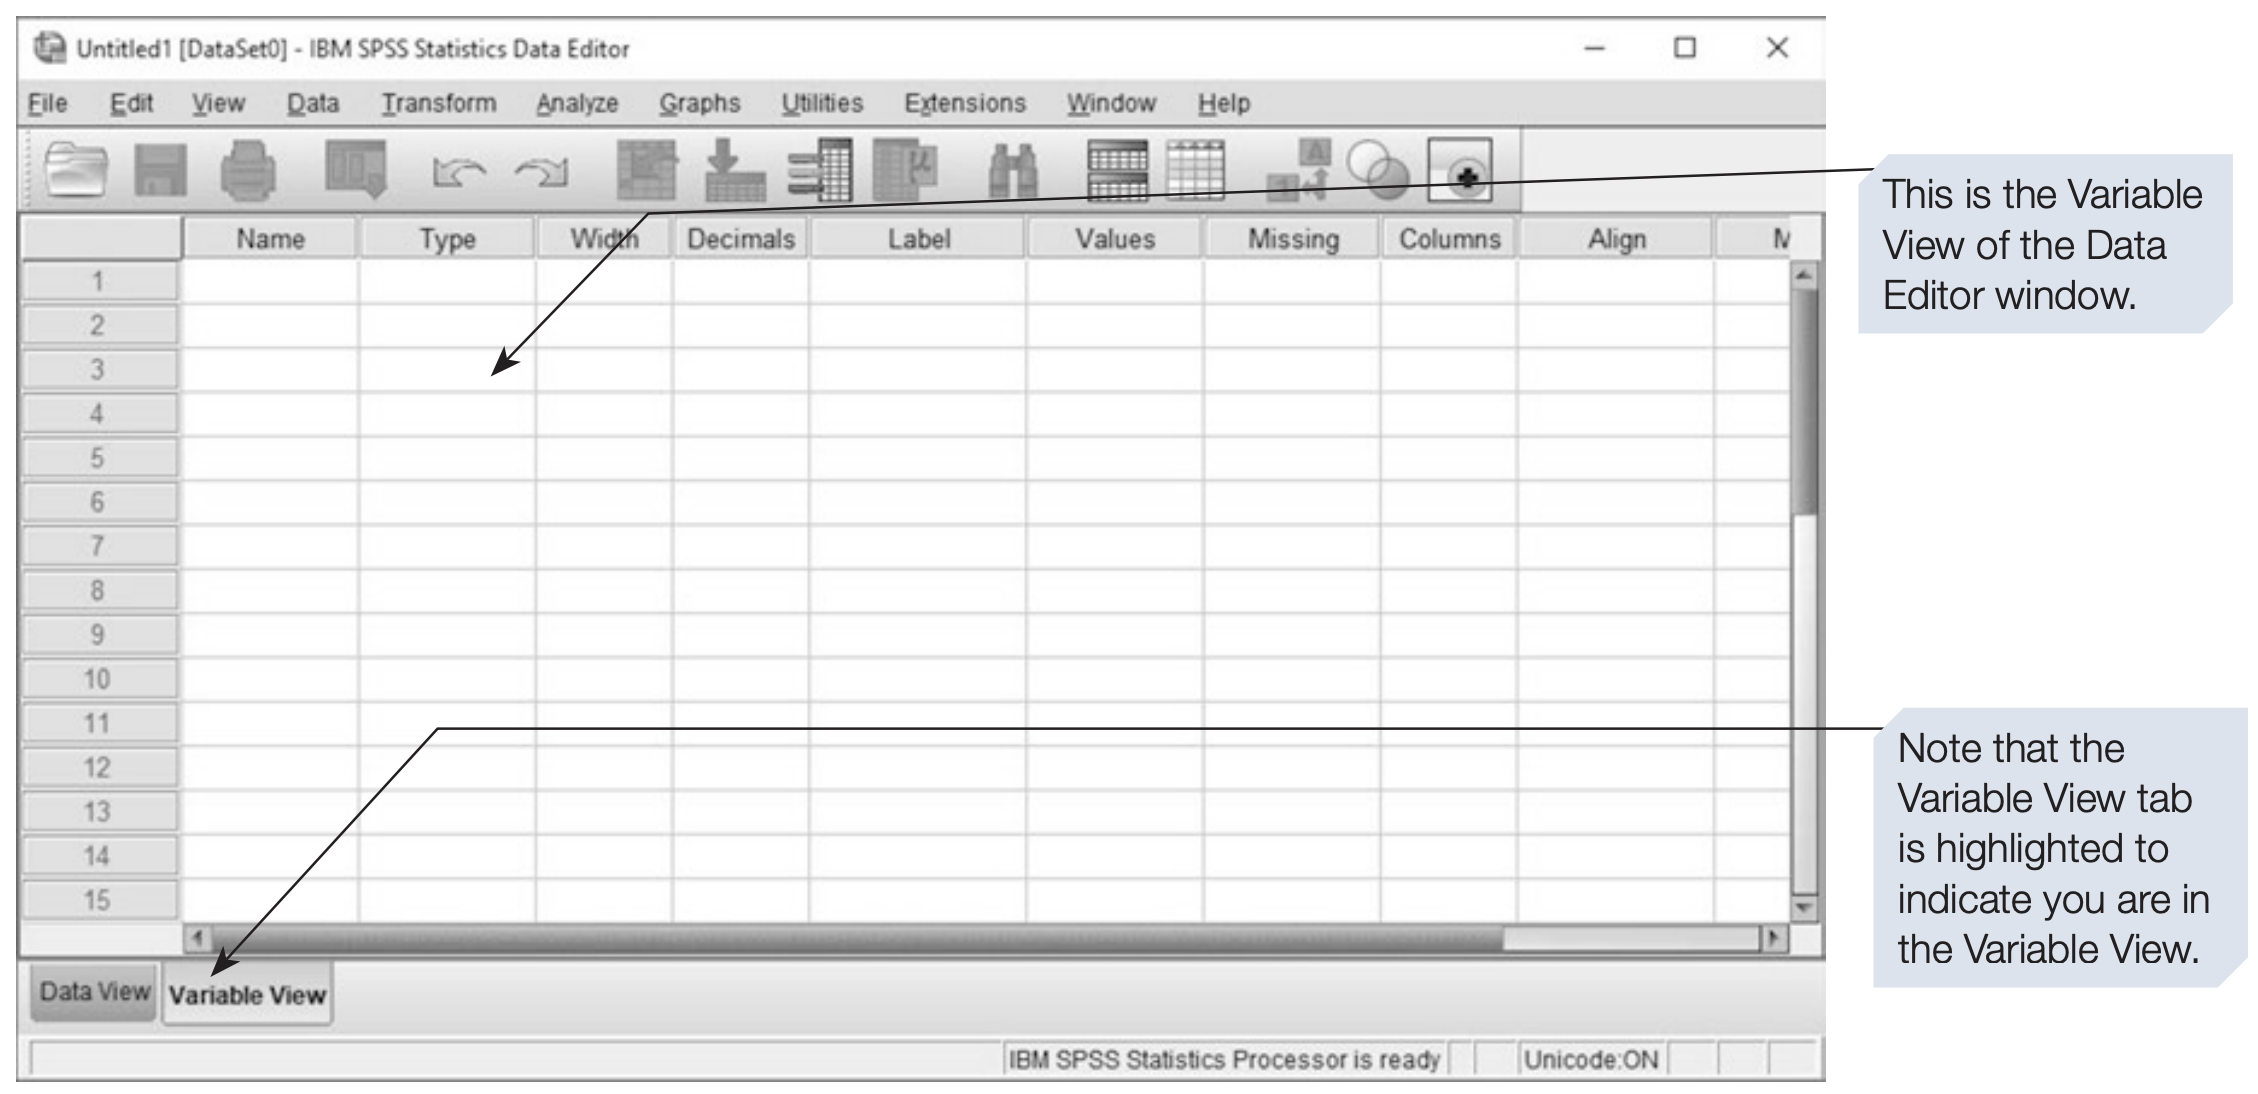
2. Defining Variables (in Variable View)
Before entering data, it is essential to define your variables properly:
- Choose clear variable names.
- Decide on coding schemes for categorical variables.
- Select appropriate formats (numeric, string, date, etc.).
Variable Name
- Must start with a letter.
- No spaces allowed (use underscore
_instead).
- Example:
age,gender,income_level.
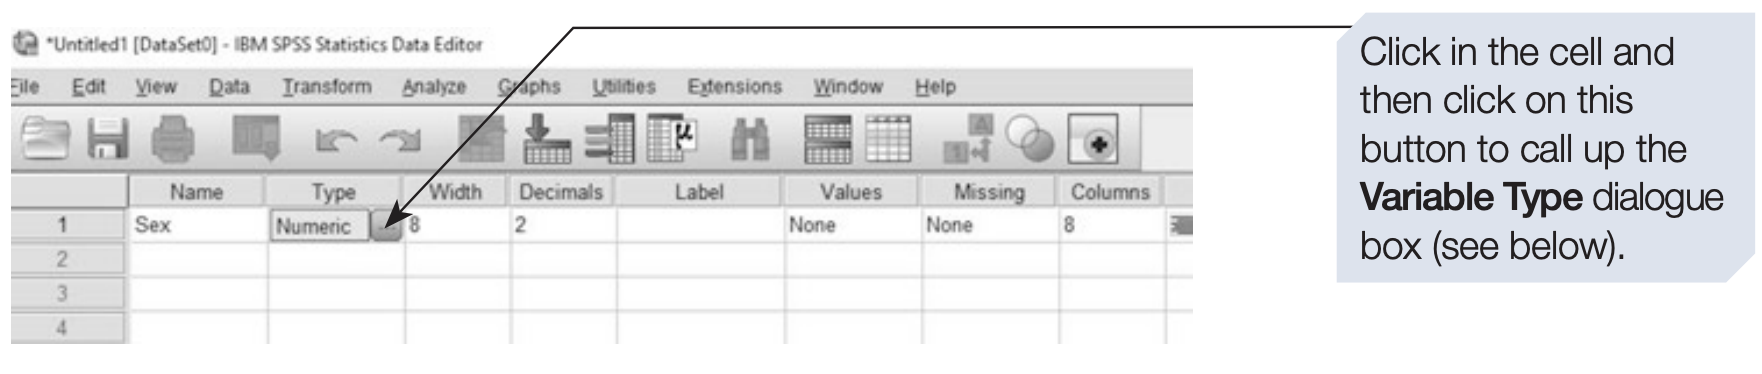
Variable Type
- Choose the correct type (numeric, string, date, etc.).
- Using numeric codes for categories is preferable (e.g.,
1 = Male,2 = Female) instead of using string variables like“M”and“F”.
- Avoid string variables whenever possible, as they complicate analysis.
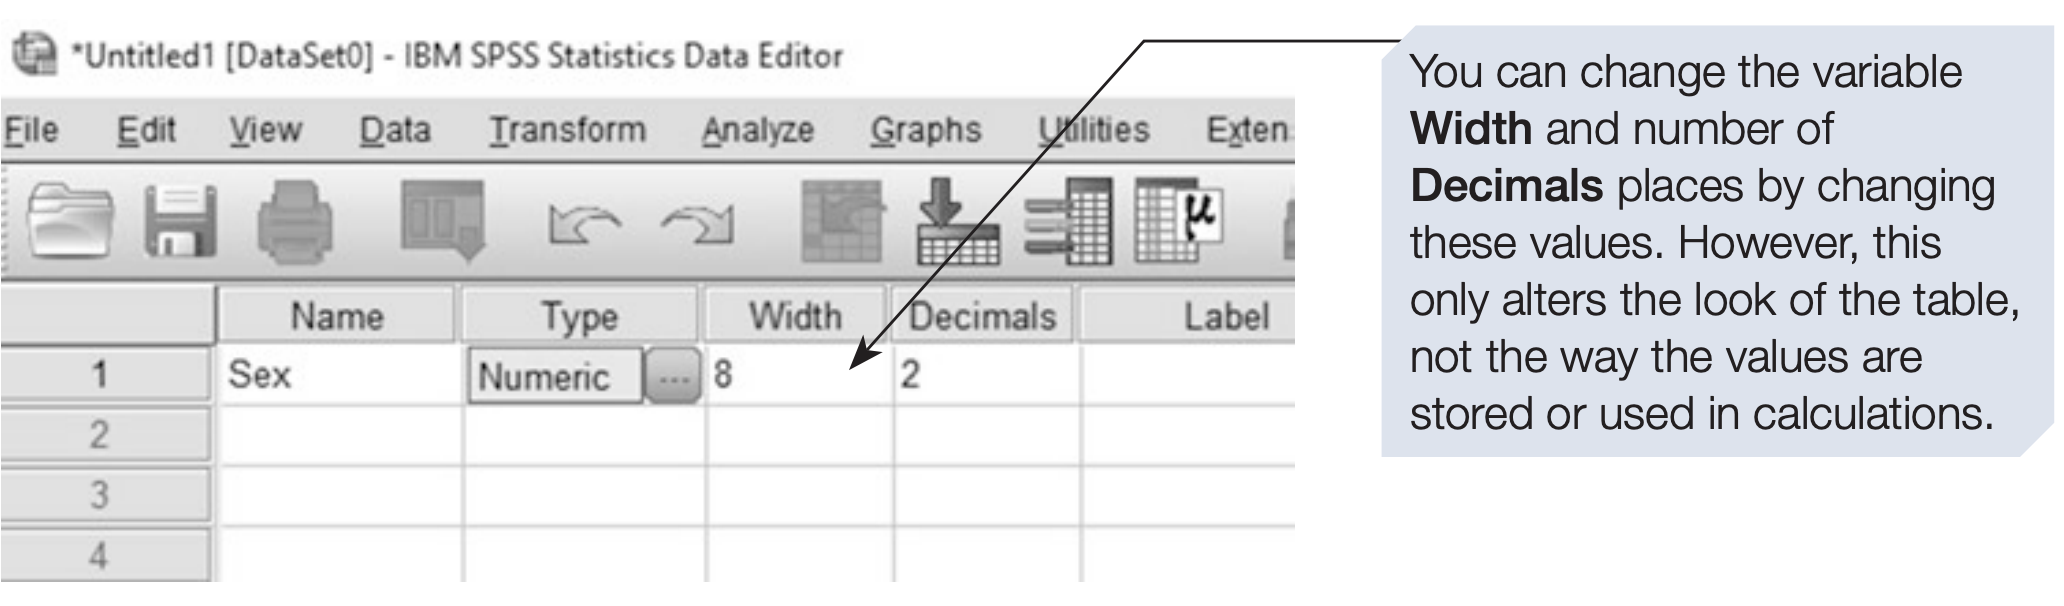
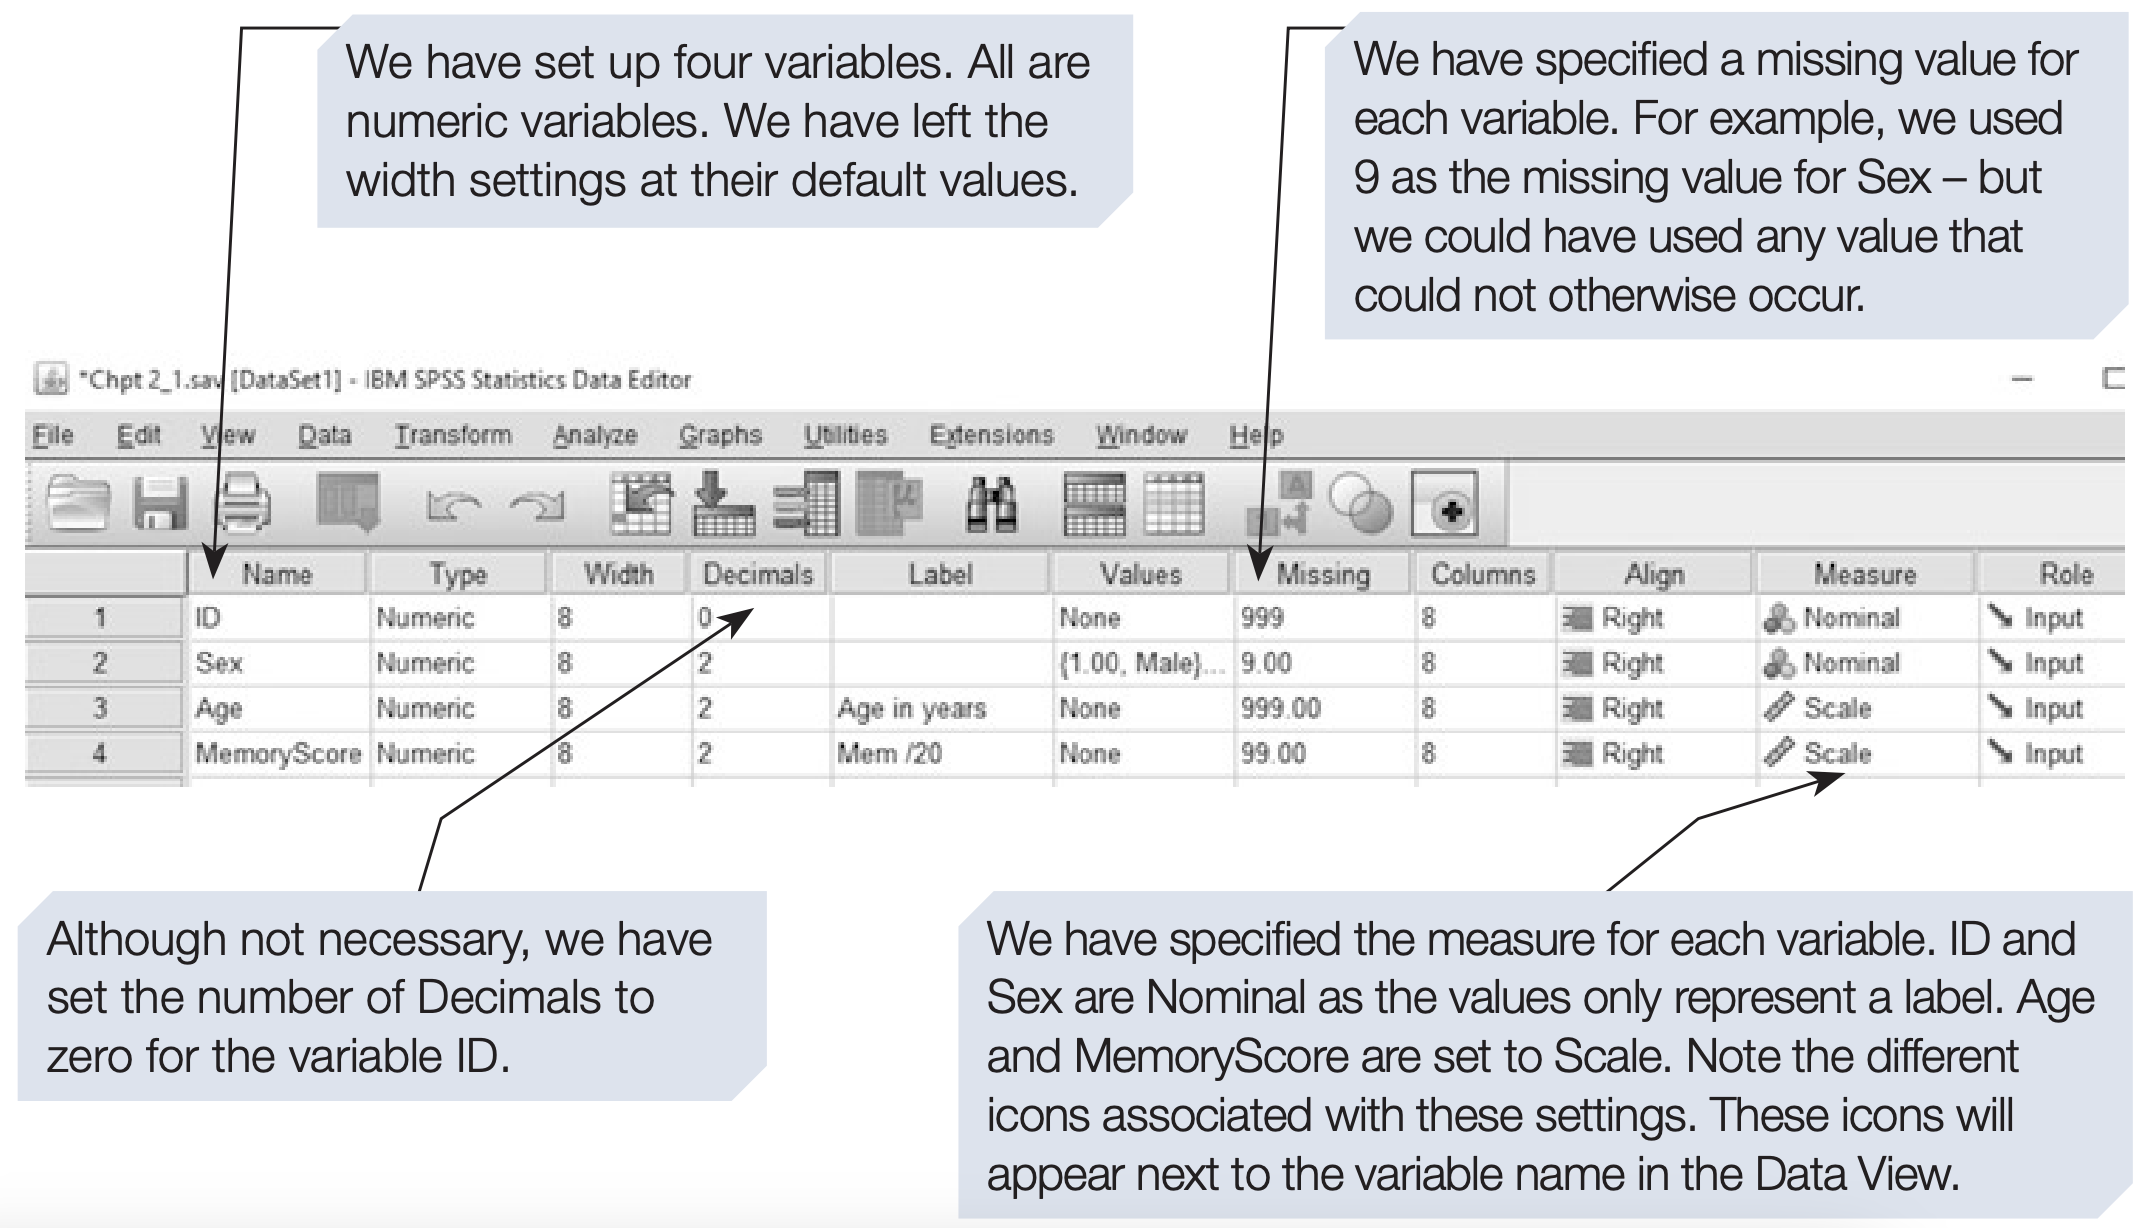
Variable Width & Decimals
- Width defines how many characters are stored.
- Decimals sets the number of decimal places.
- Defaults are usually sufficient unless specific formatting is required.
Variable Labels
- Add descriptive labels (e.g., Respondent Age in Years).
- These appear in SPSS output and help in interpretation.
- Not mandatory, but highly recommended for clarity.
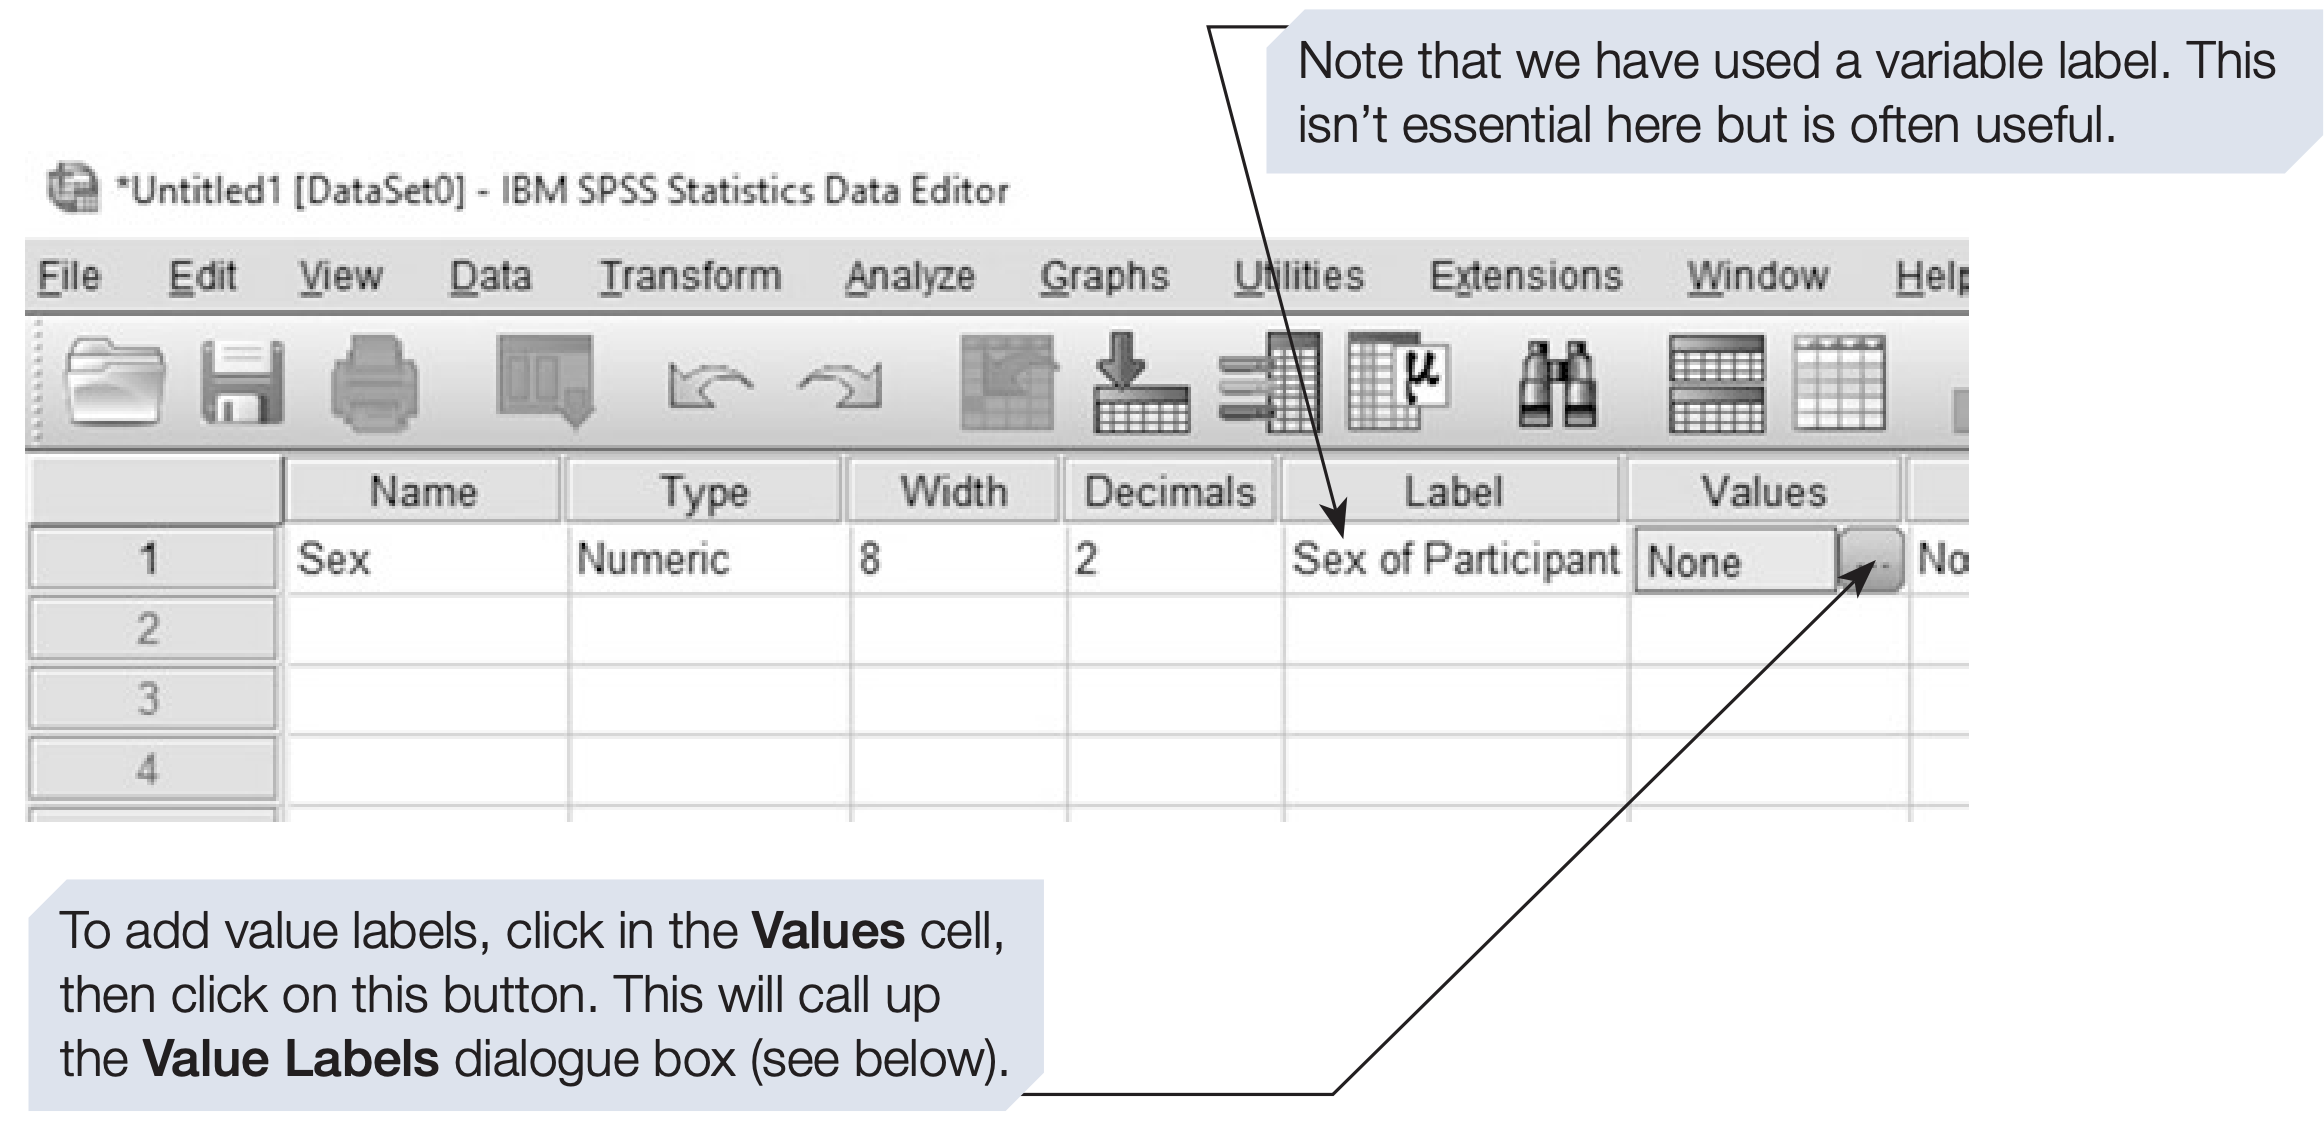
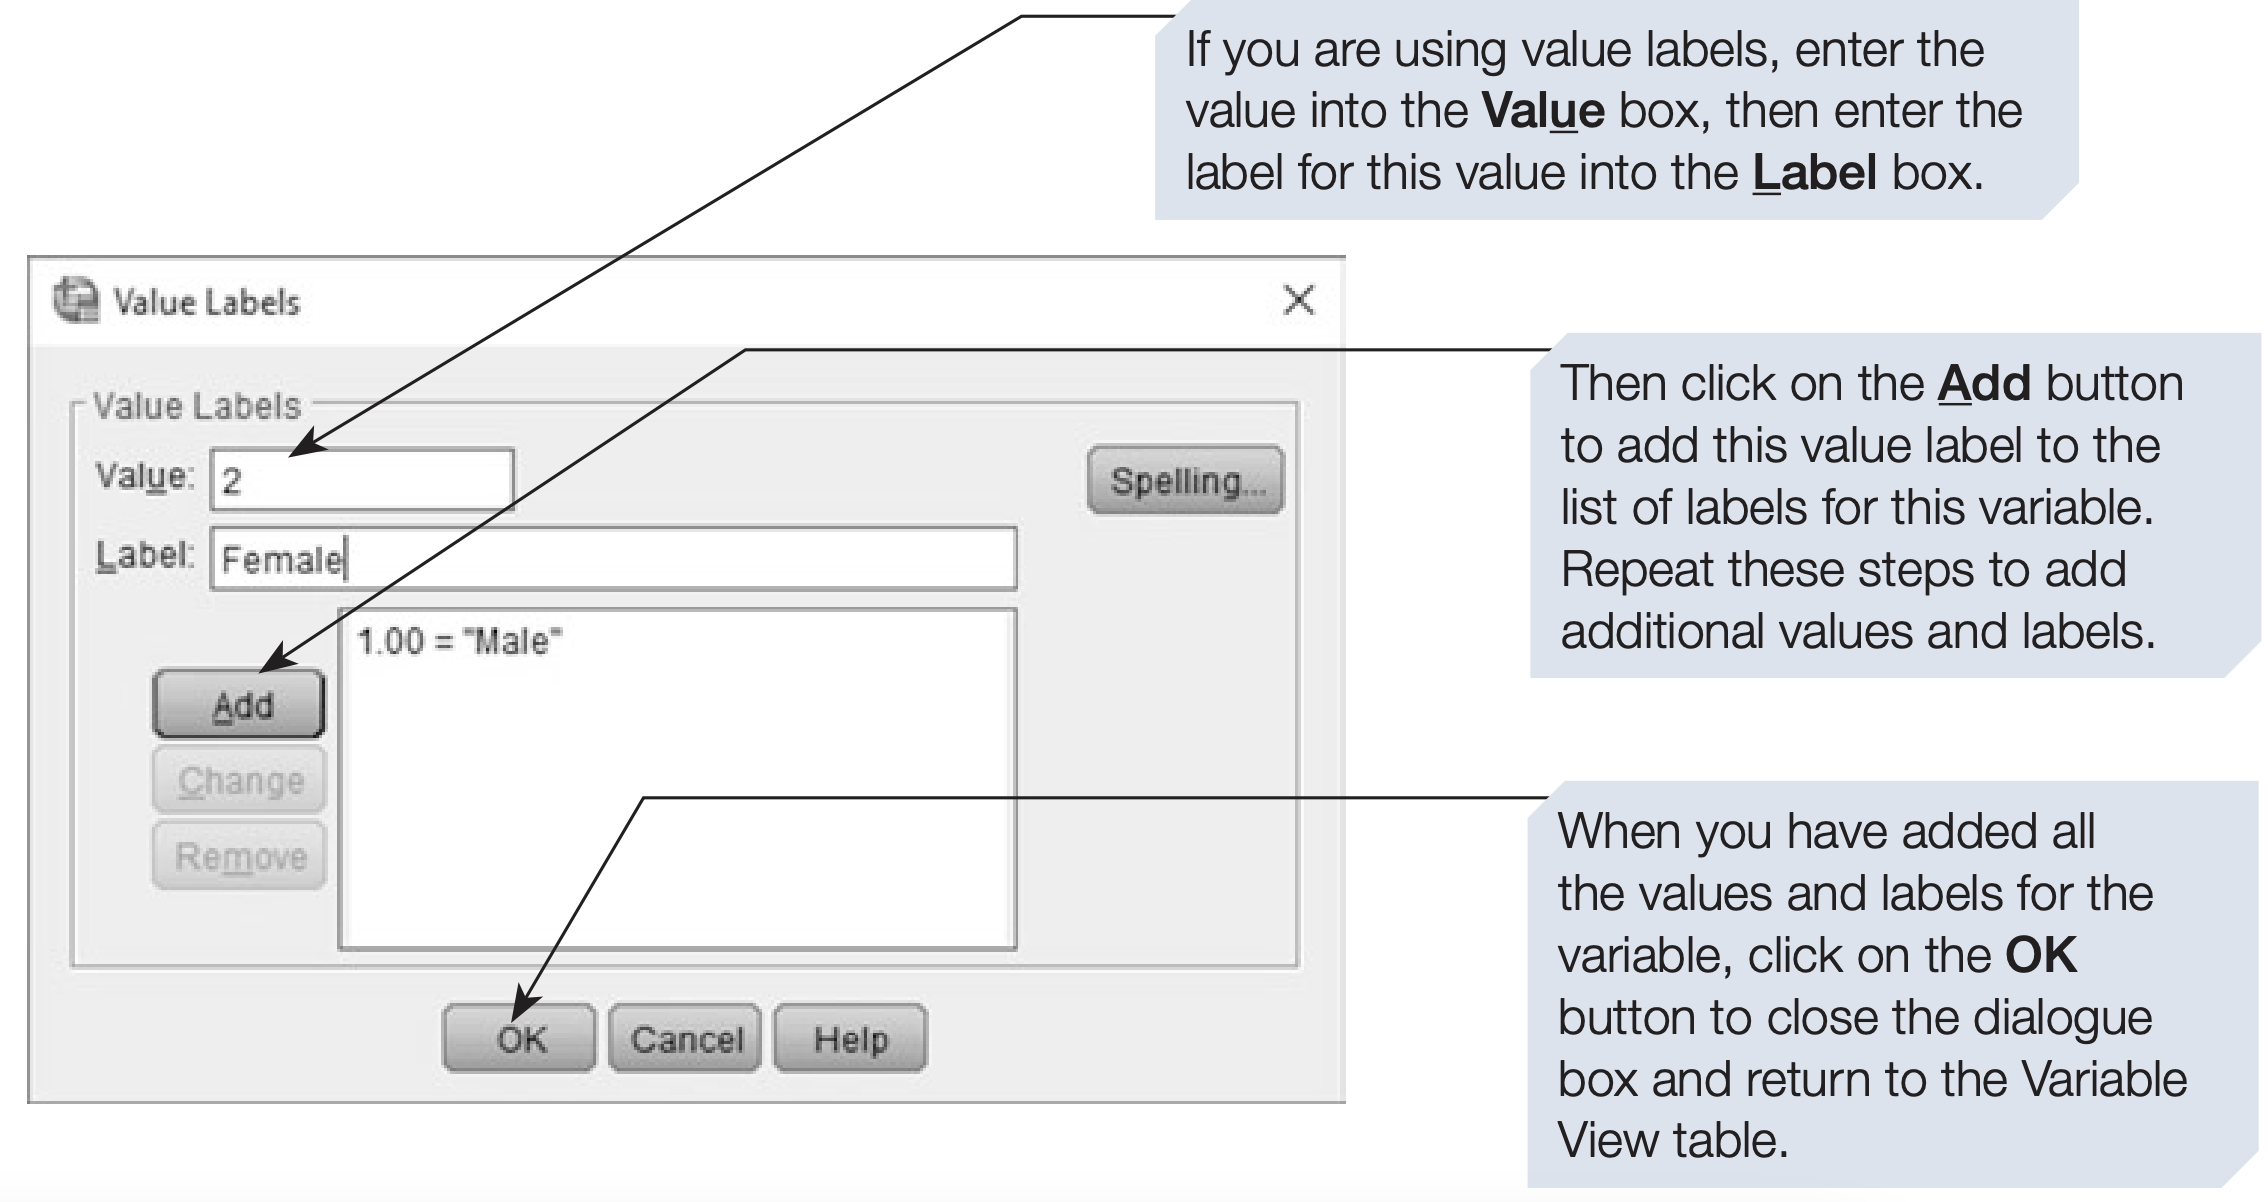
Value Labels
- Assign meaning to numeric codes.
- Example:
1 = Male,2 = Female.
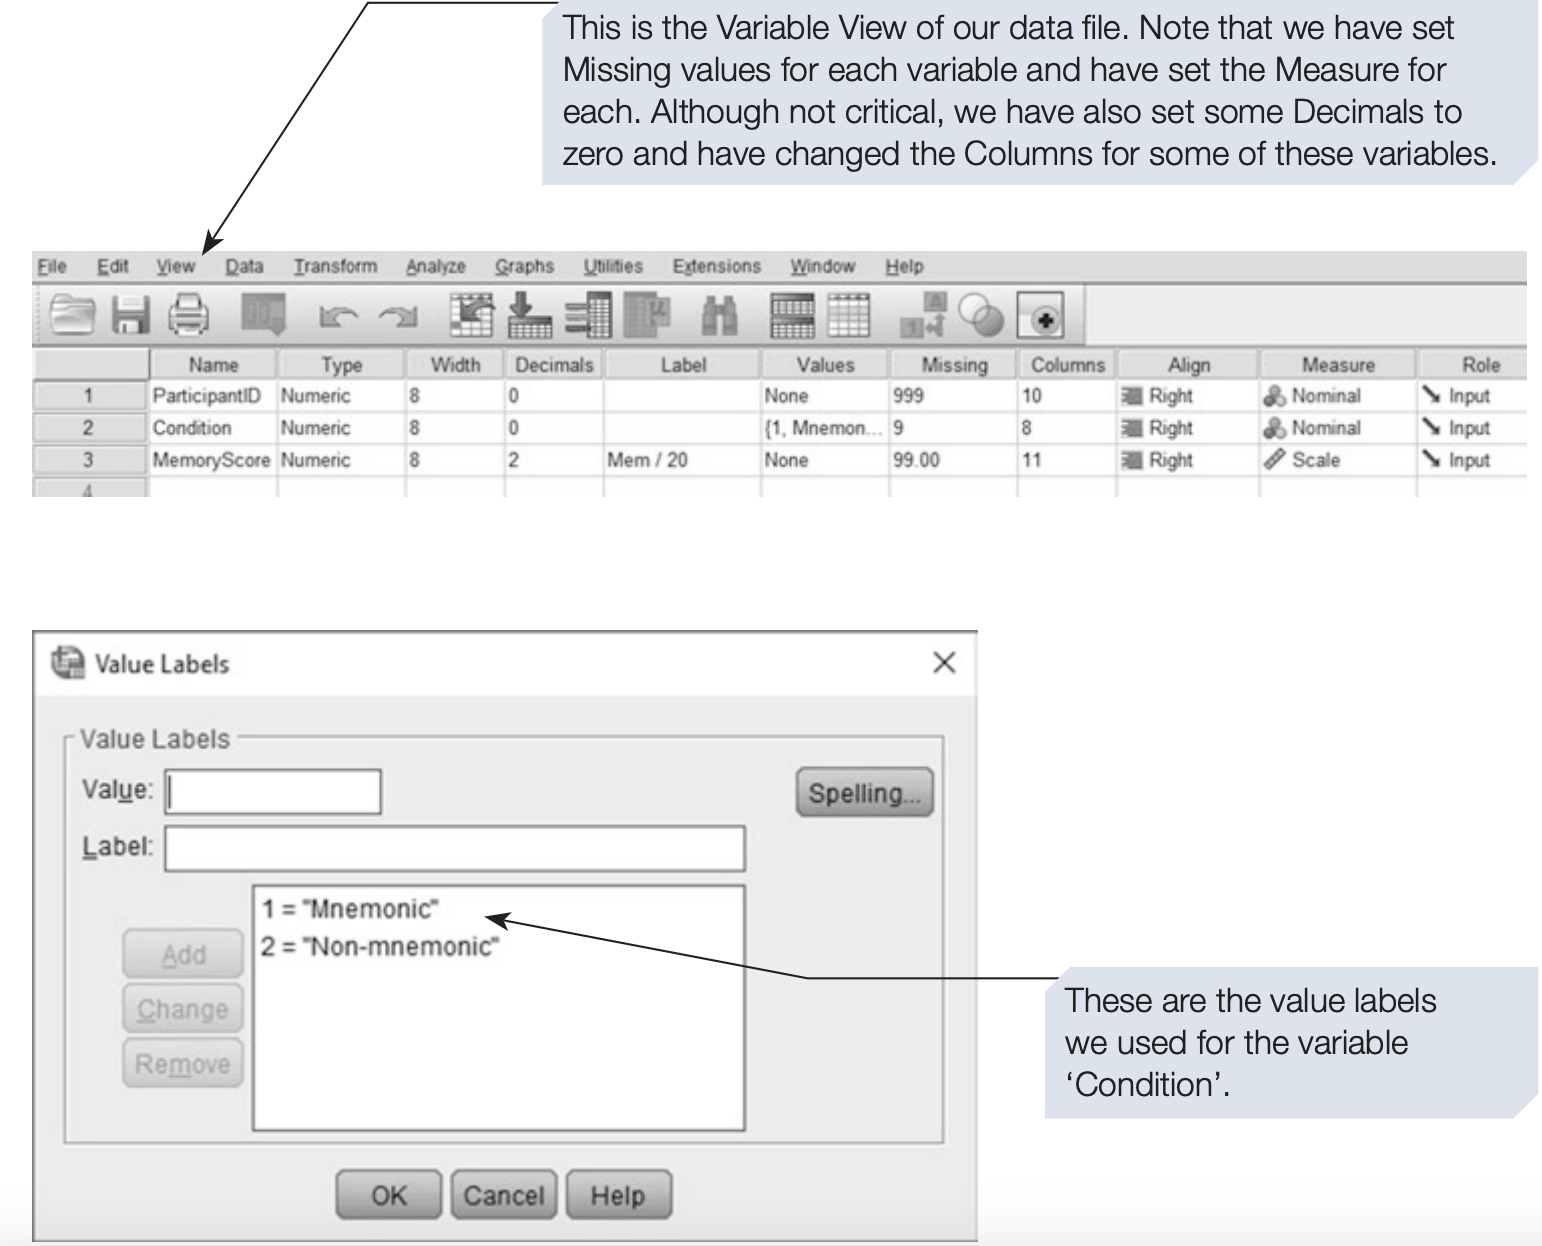
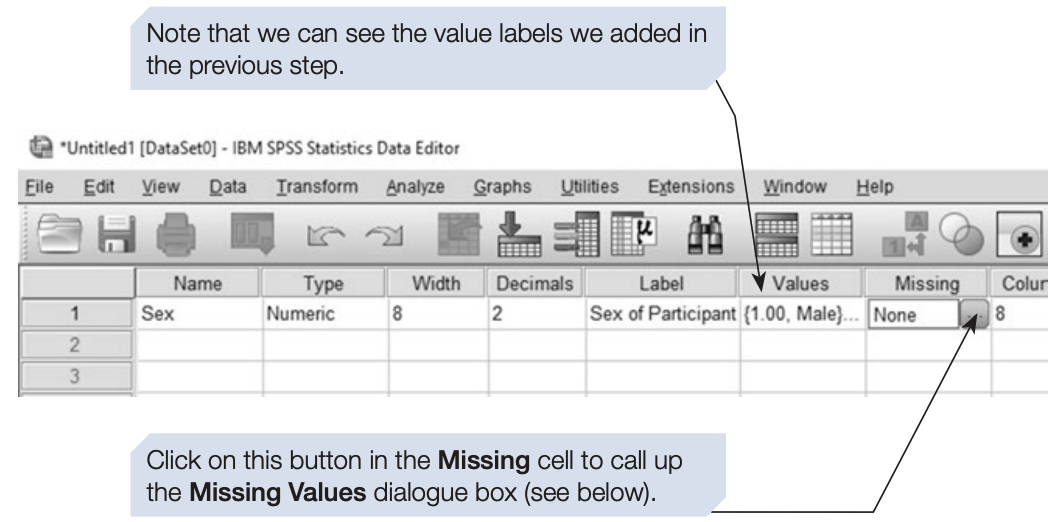
Missing Values
- Define user-missing codes (e.g., 99 = missing).
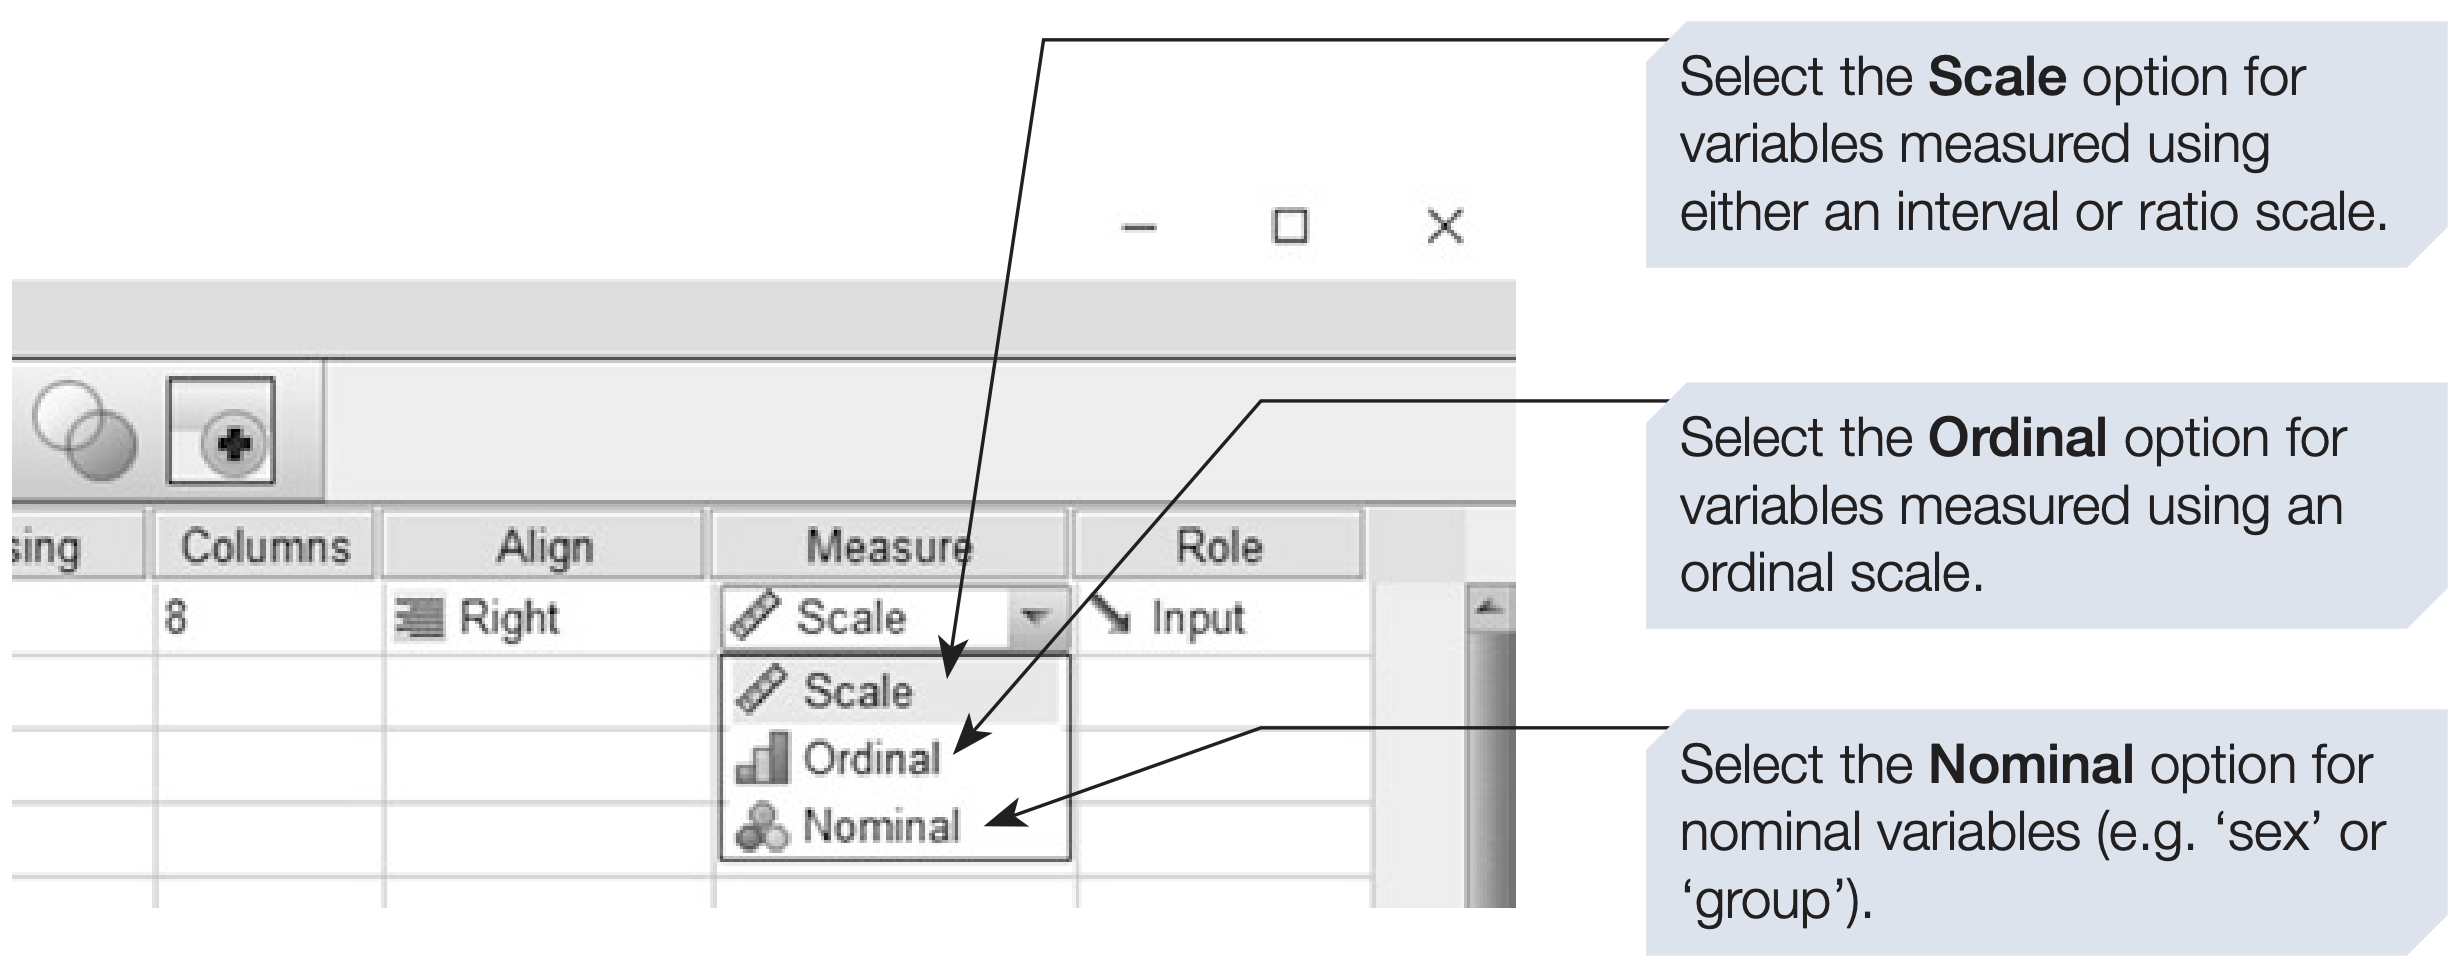
Measure
- This is used to specify the level of measurement for the variable.
- SPSS offers three options: Nominal, Ordinal and Scale
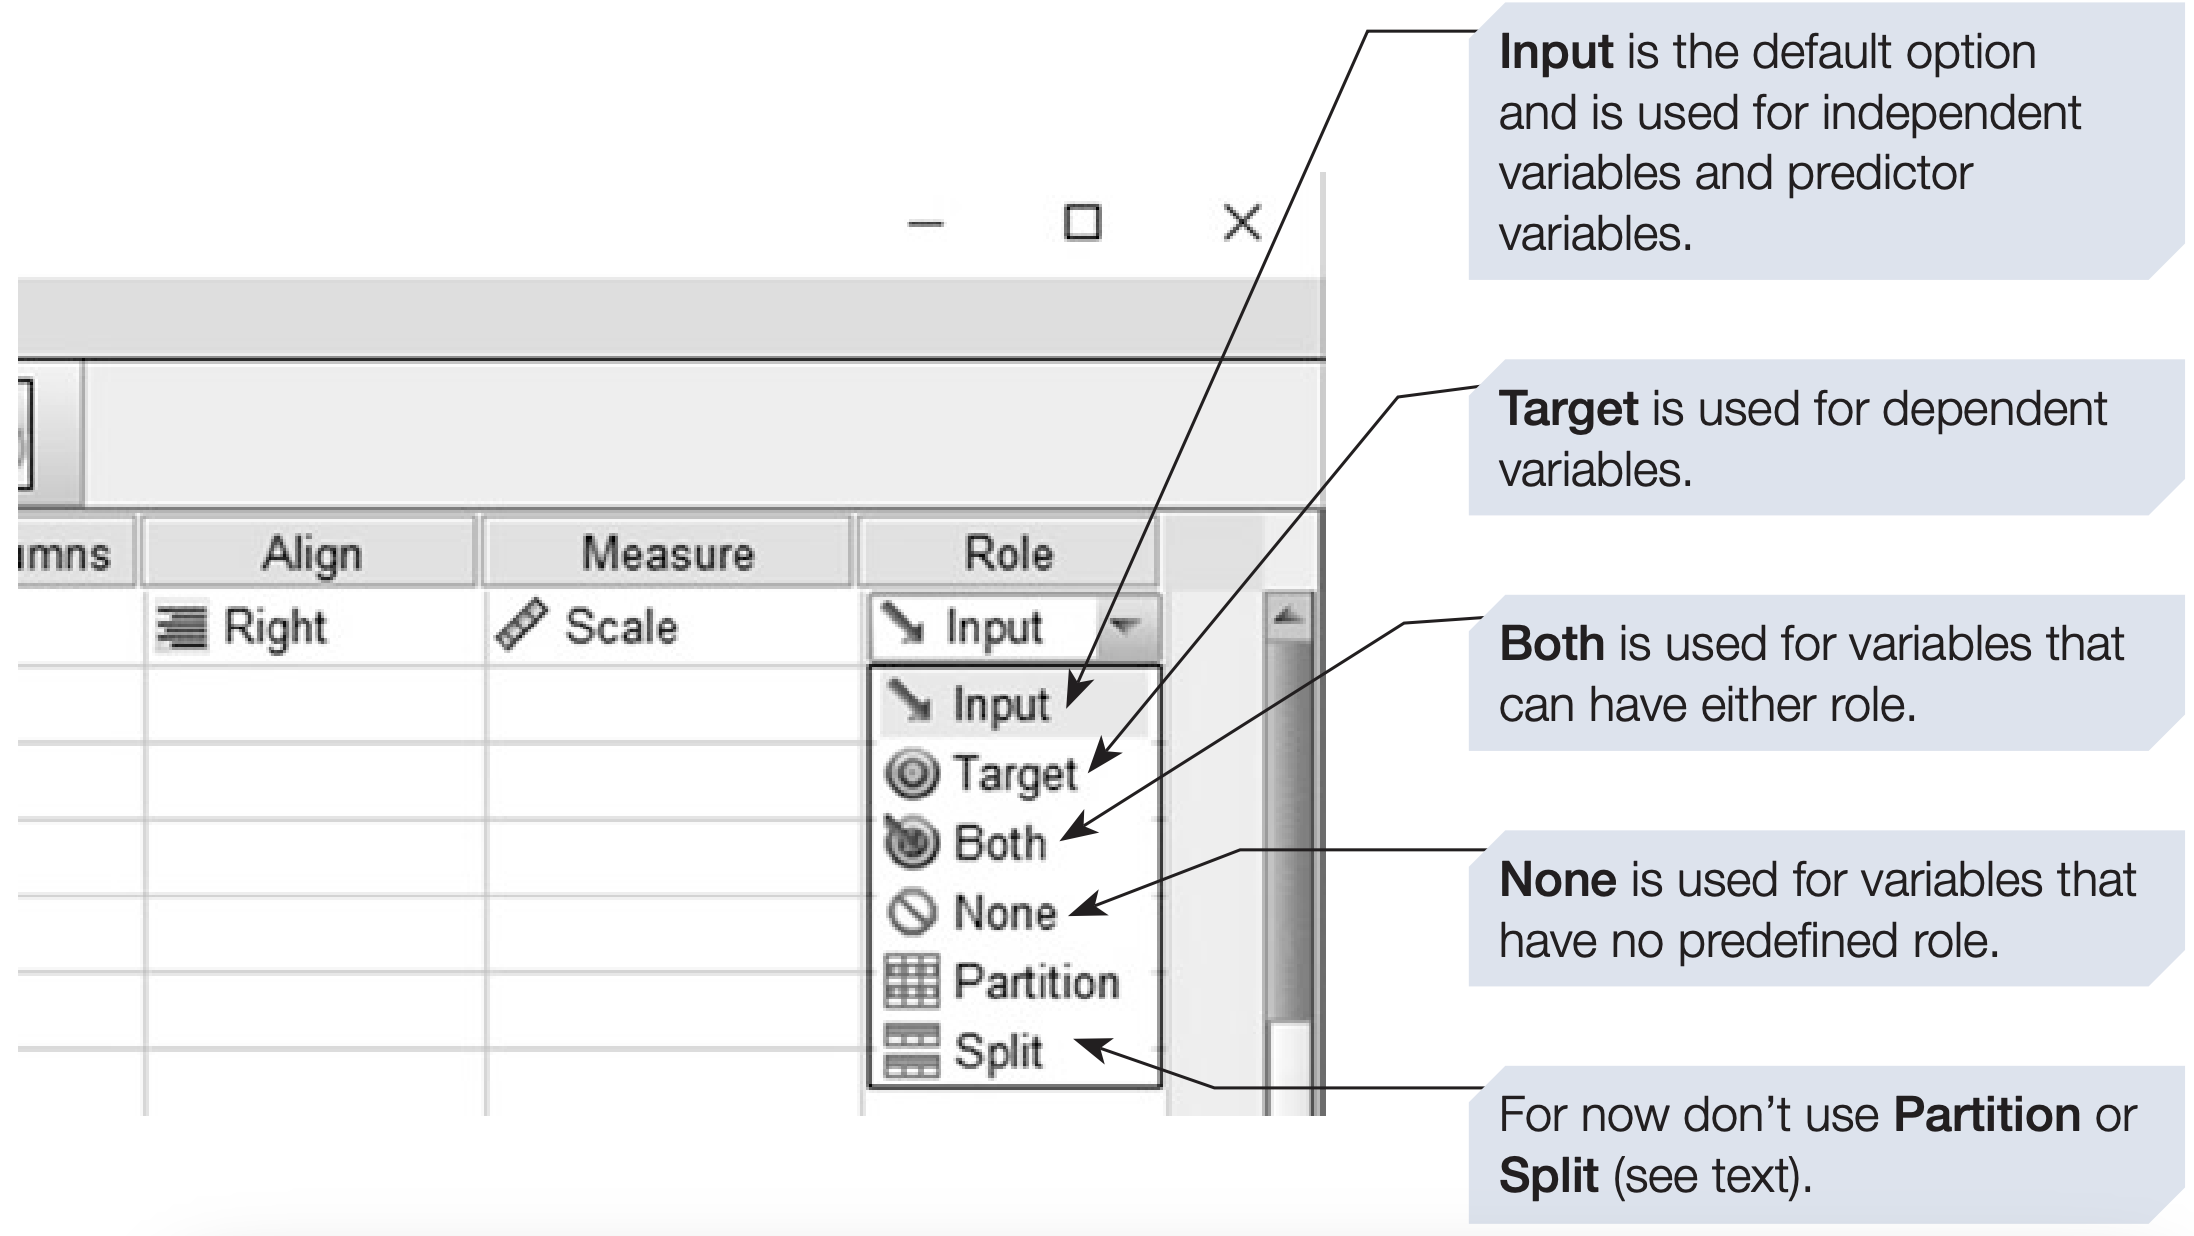
Role
- The final column of the Variable View table is called Role.
- This is a fairly recent addition to SPSS and is intended to help users select appropriate analyses.
3. Entering Data (in Data View)
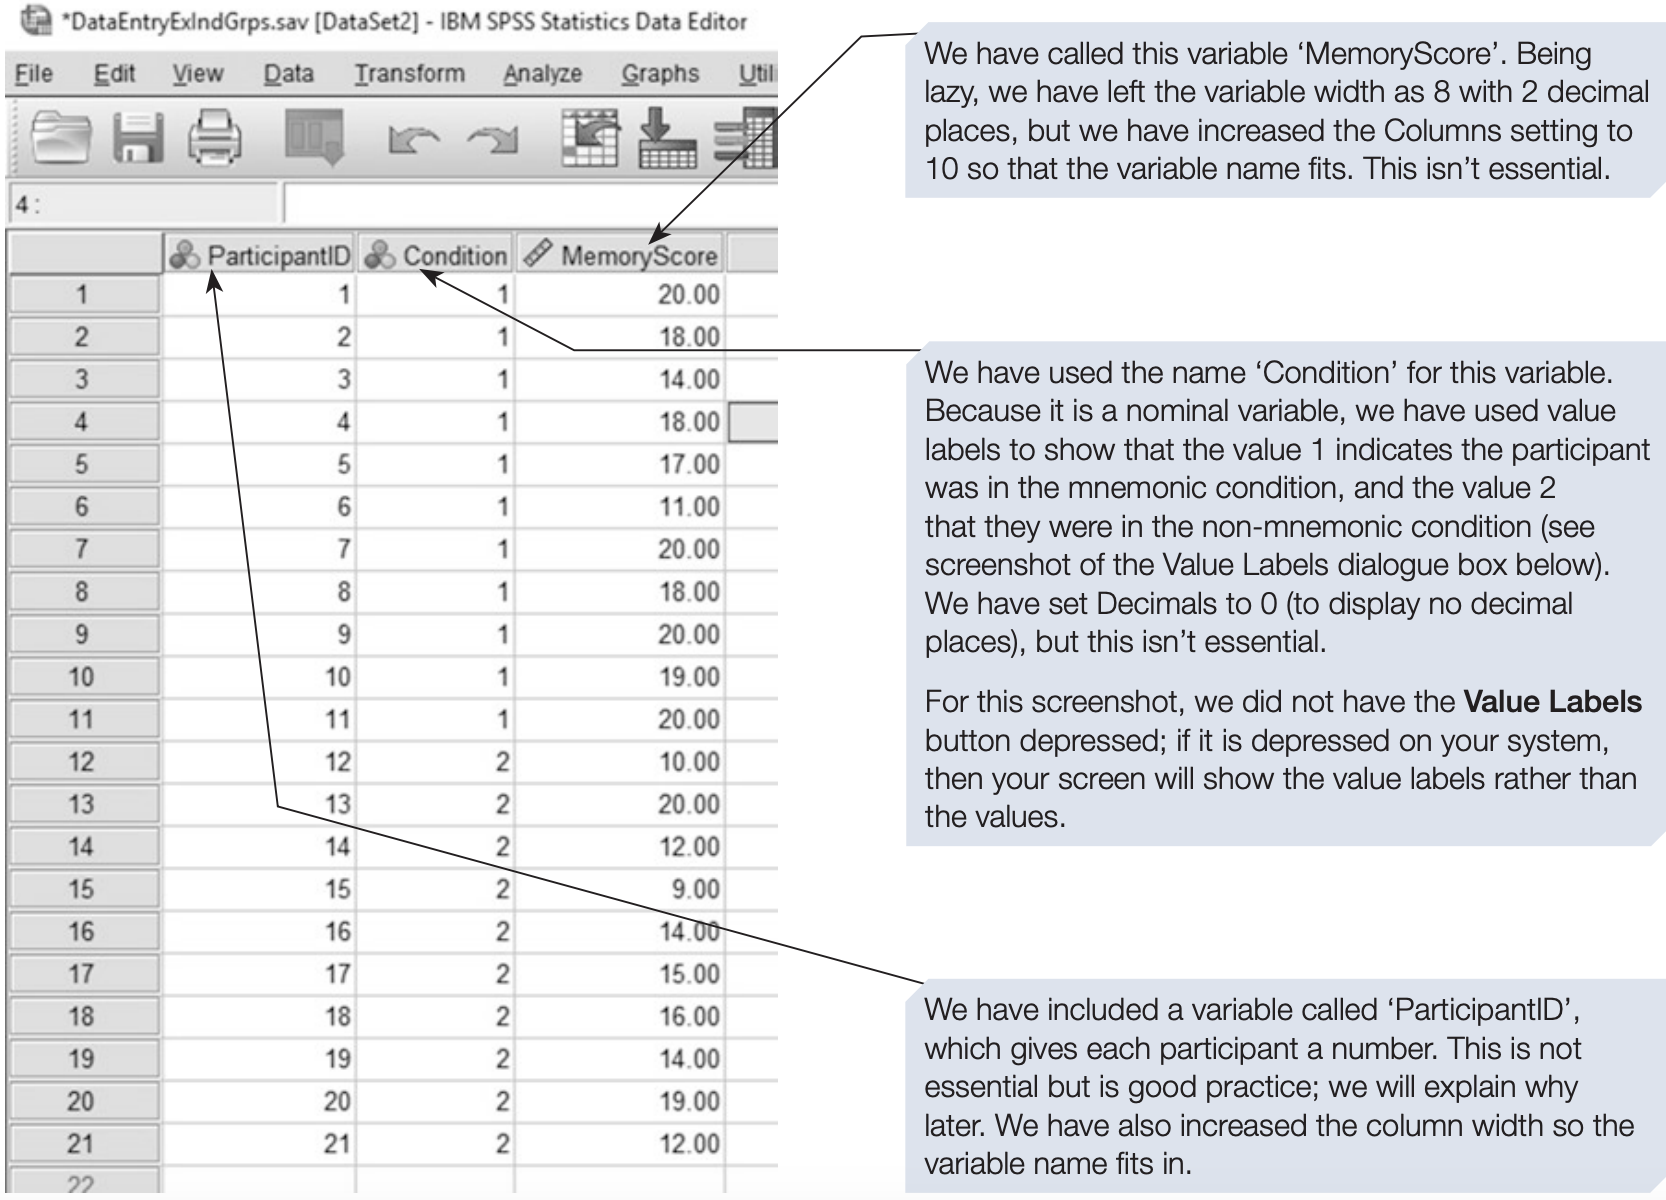
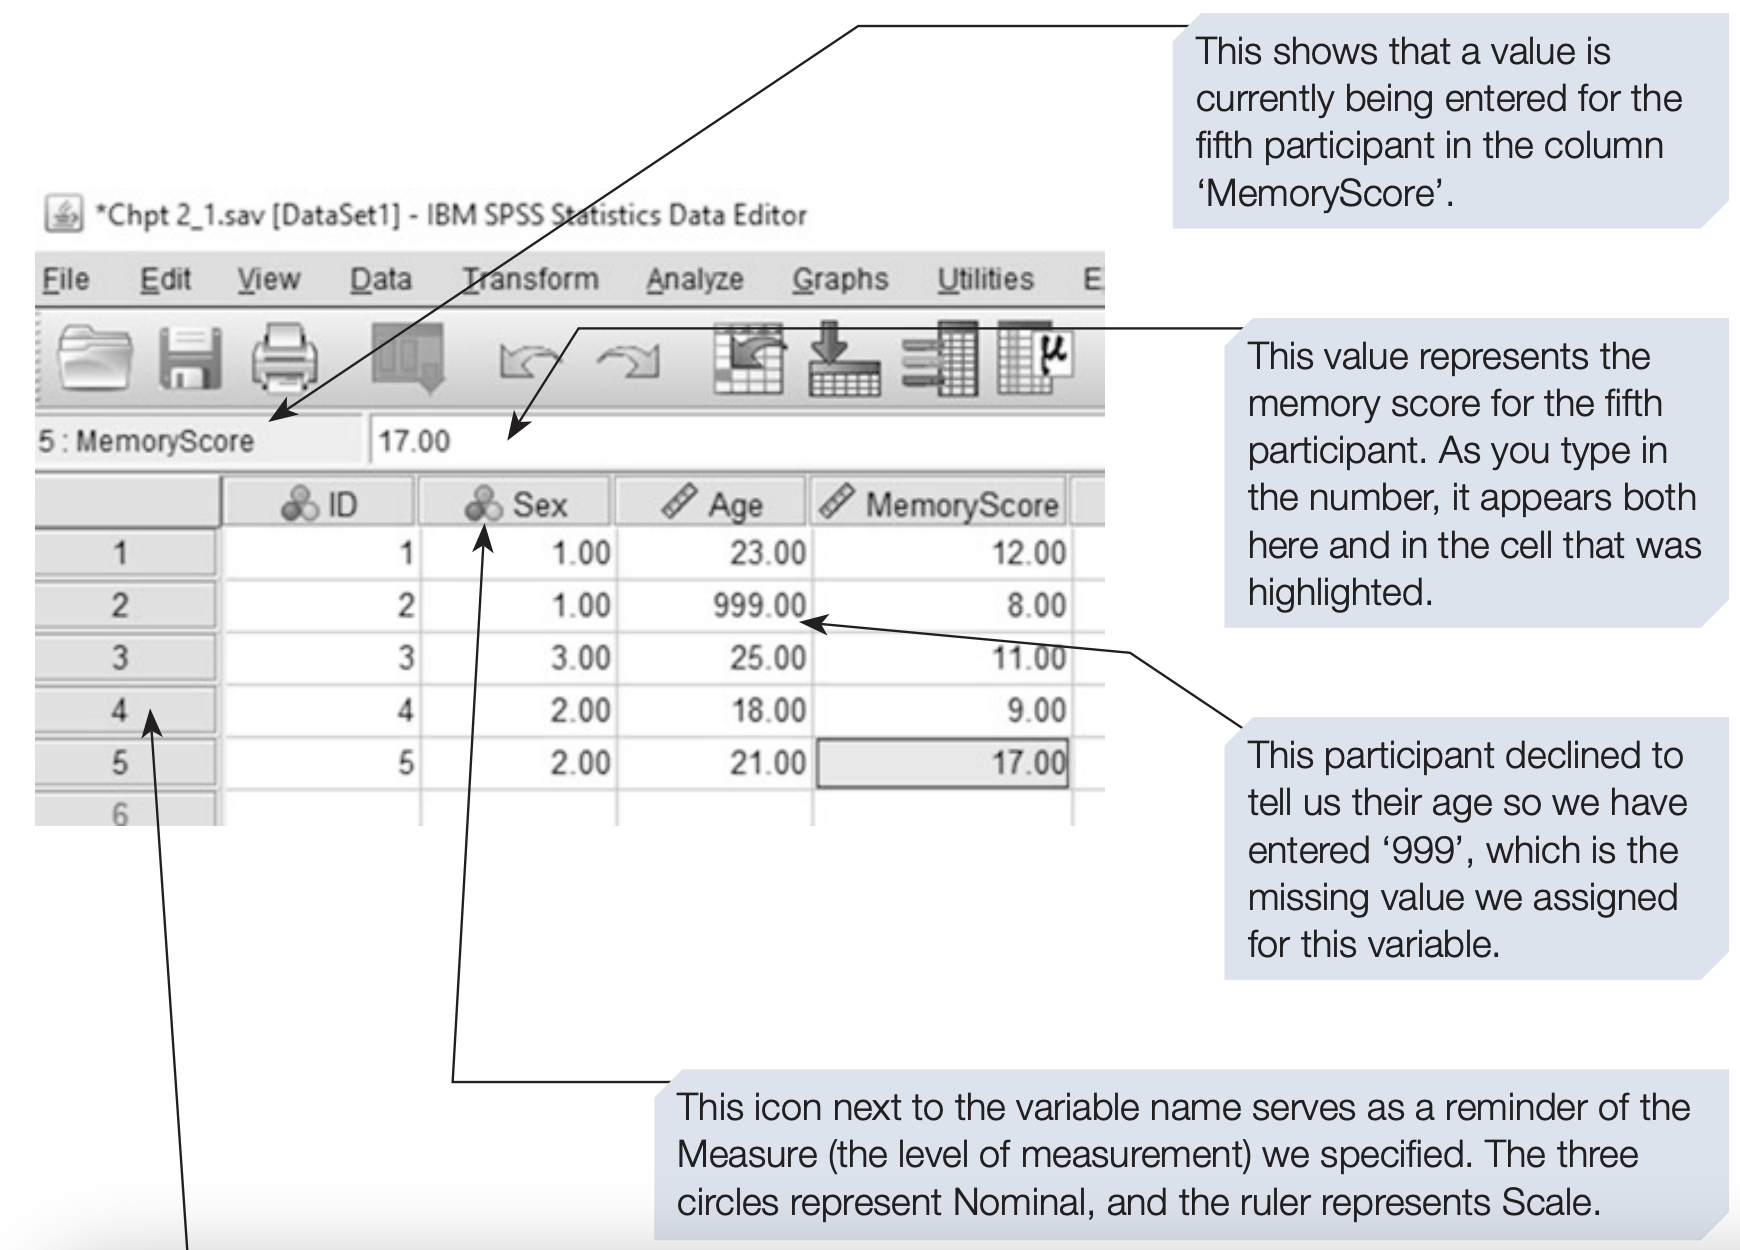
We will enter the data from a simple study in which we have recorded each participant’s
- Sex (coded as 1 = Male, 2 = Female and 3 = Other),
- Age (in years) and the
- MemoryScore (number of words recalled from a list of 20) of each participant.
In addition we have assigned each participant an ID number.
Before we can enter these data, we need to define the four variables to be used (see the previous section for details of how to define a variable)
Defining variables in Variable View
- Each row = one observation (e.g., one respondent).
- Each column = one variable (e.g., Sex, Age, Score).
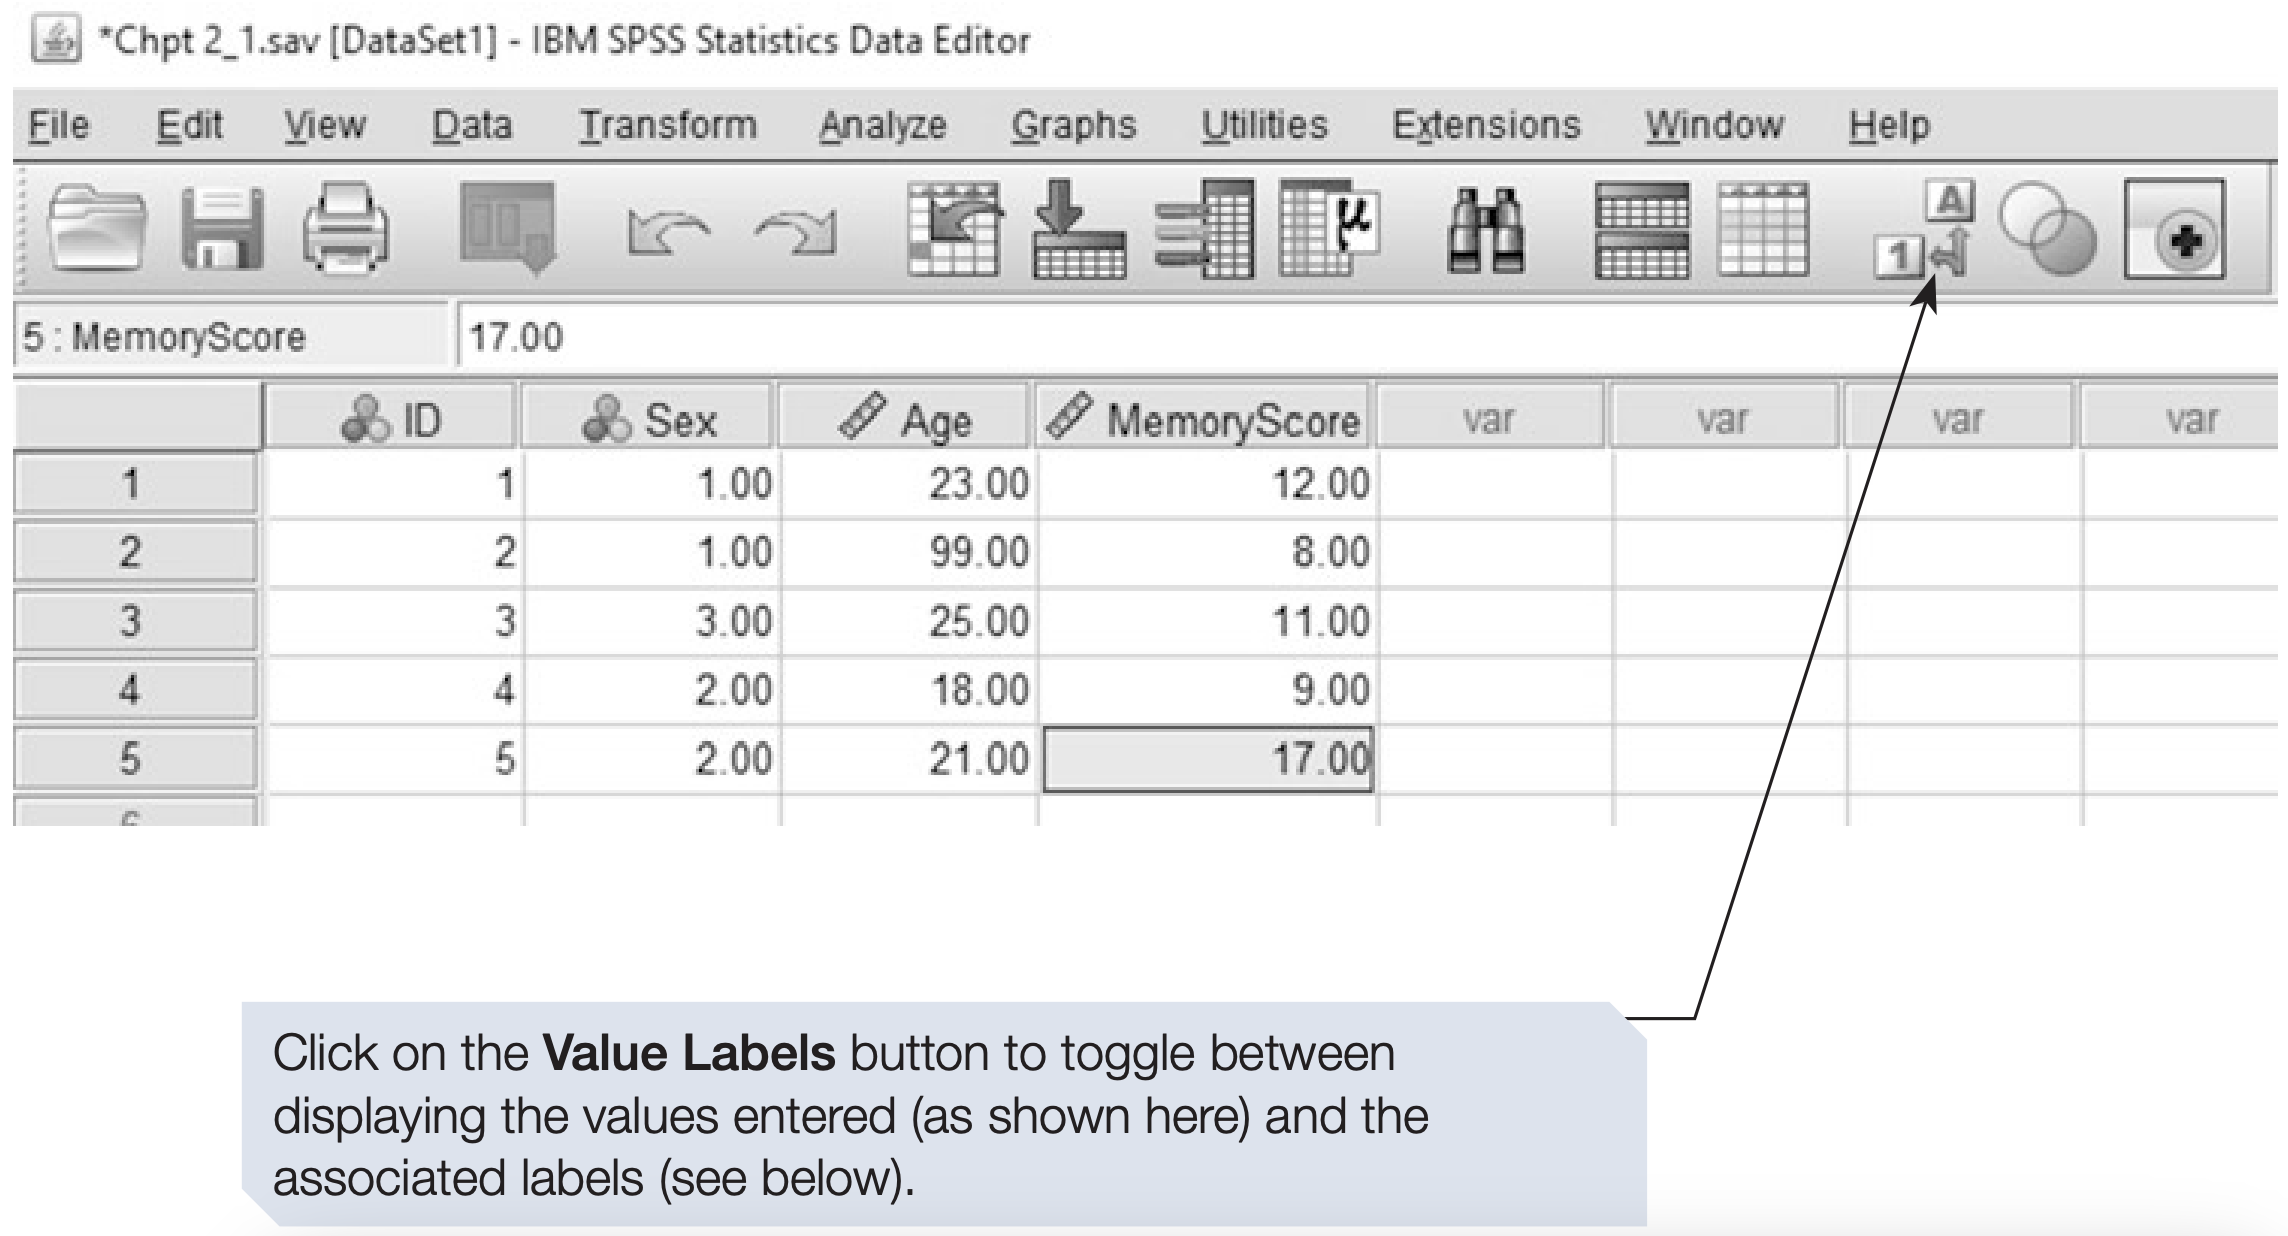
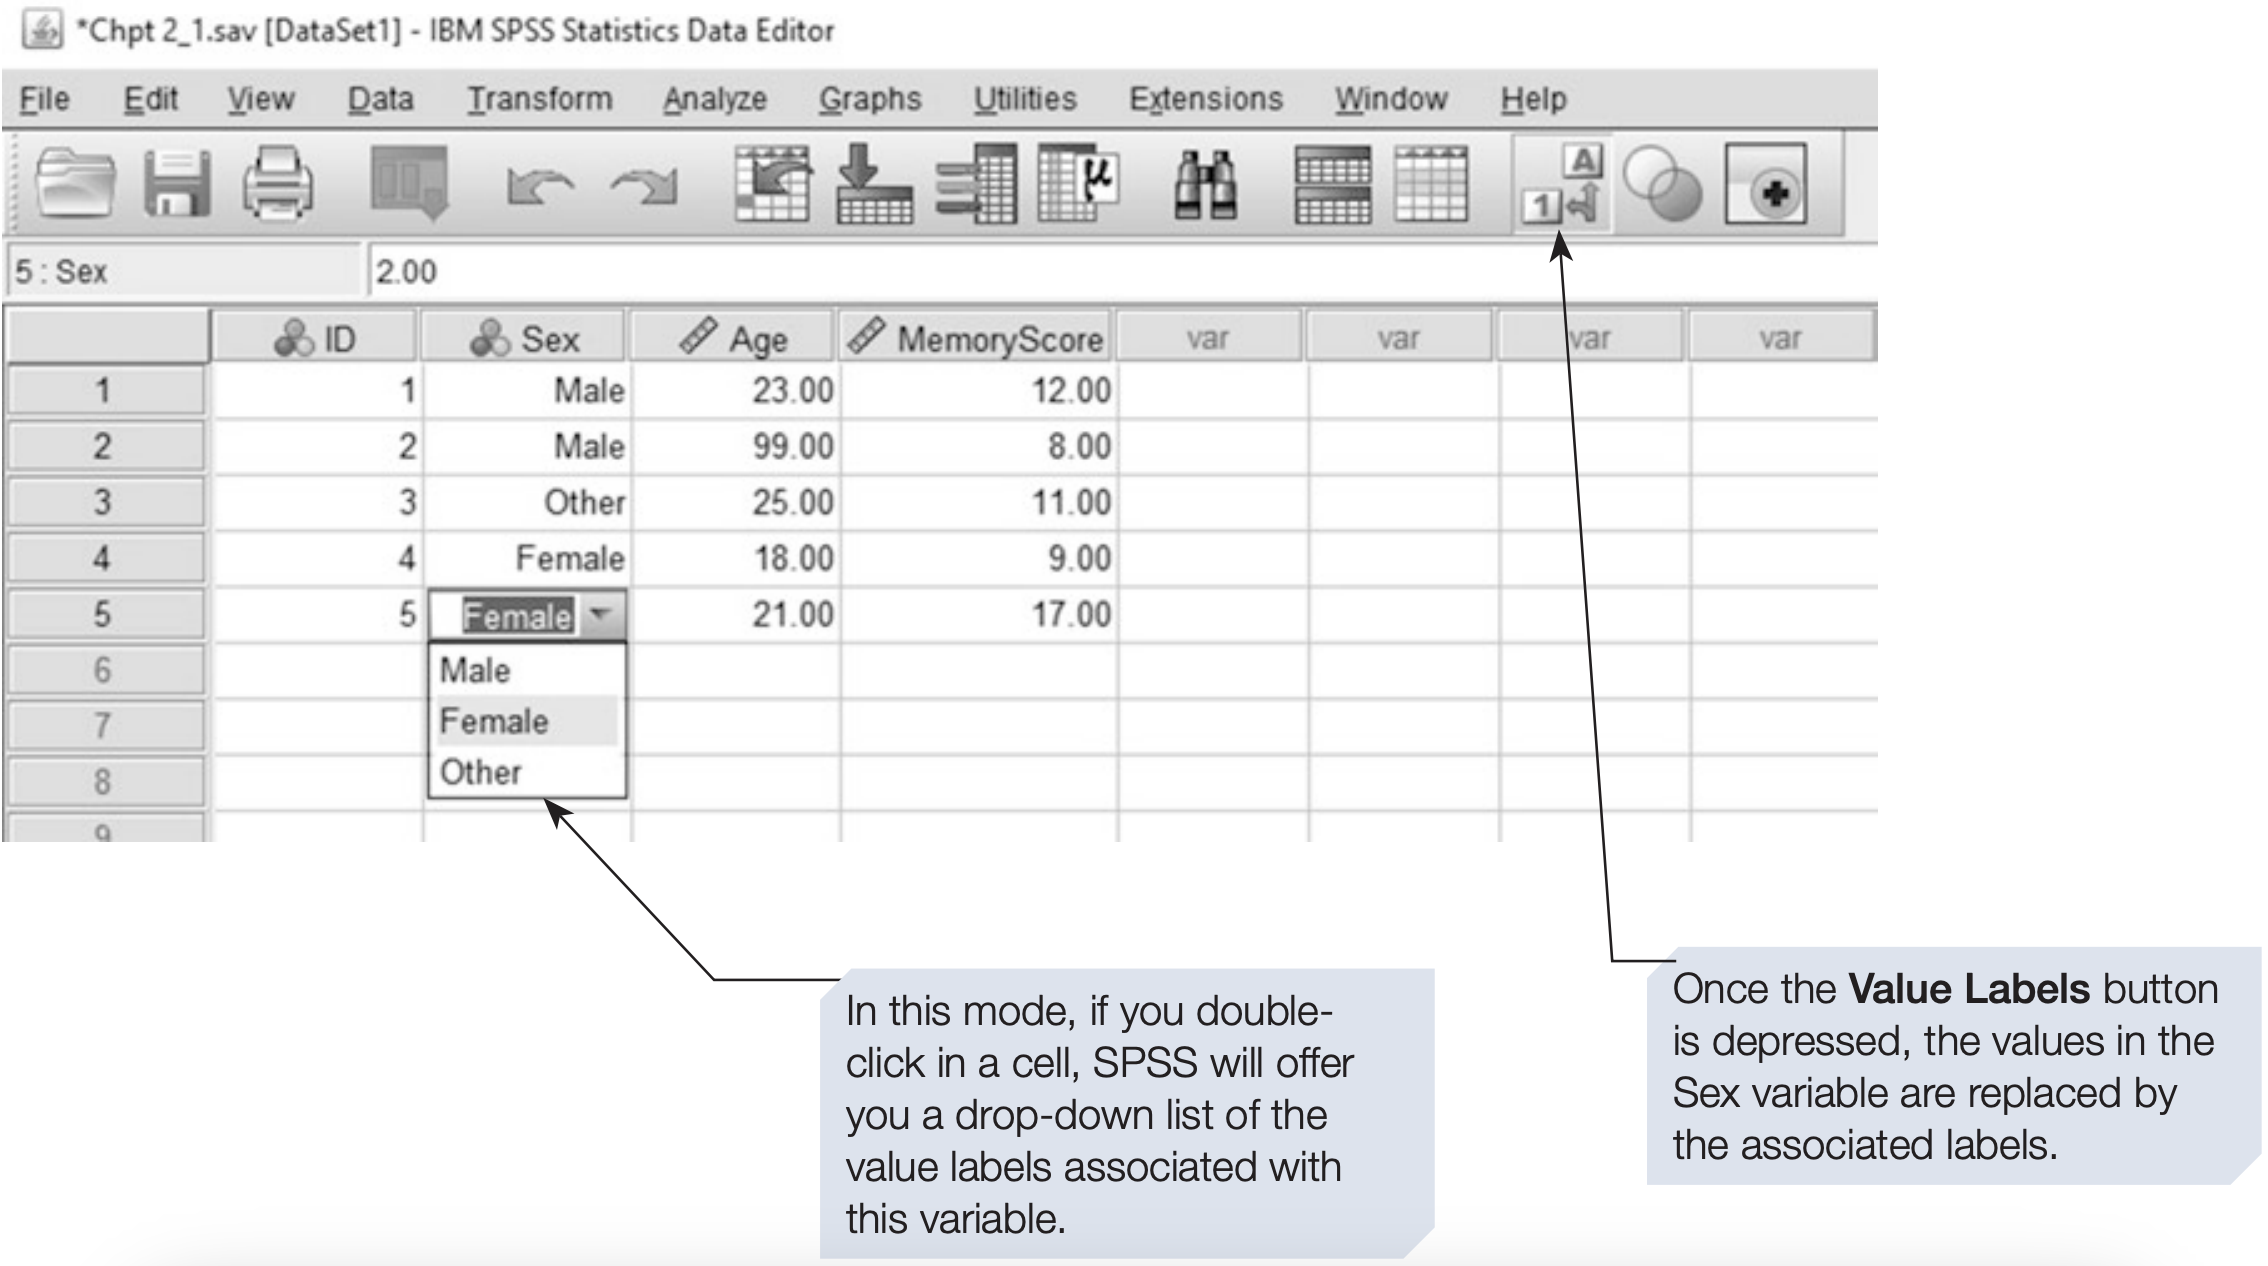
The Value Labels Button
4. Saving a Data File
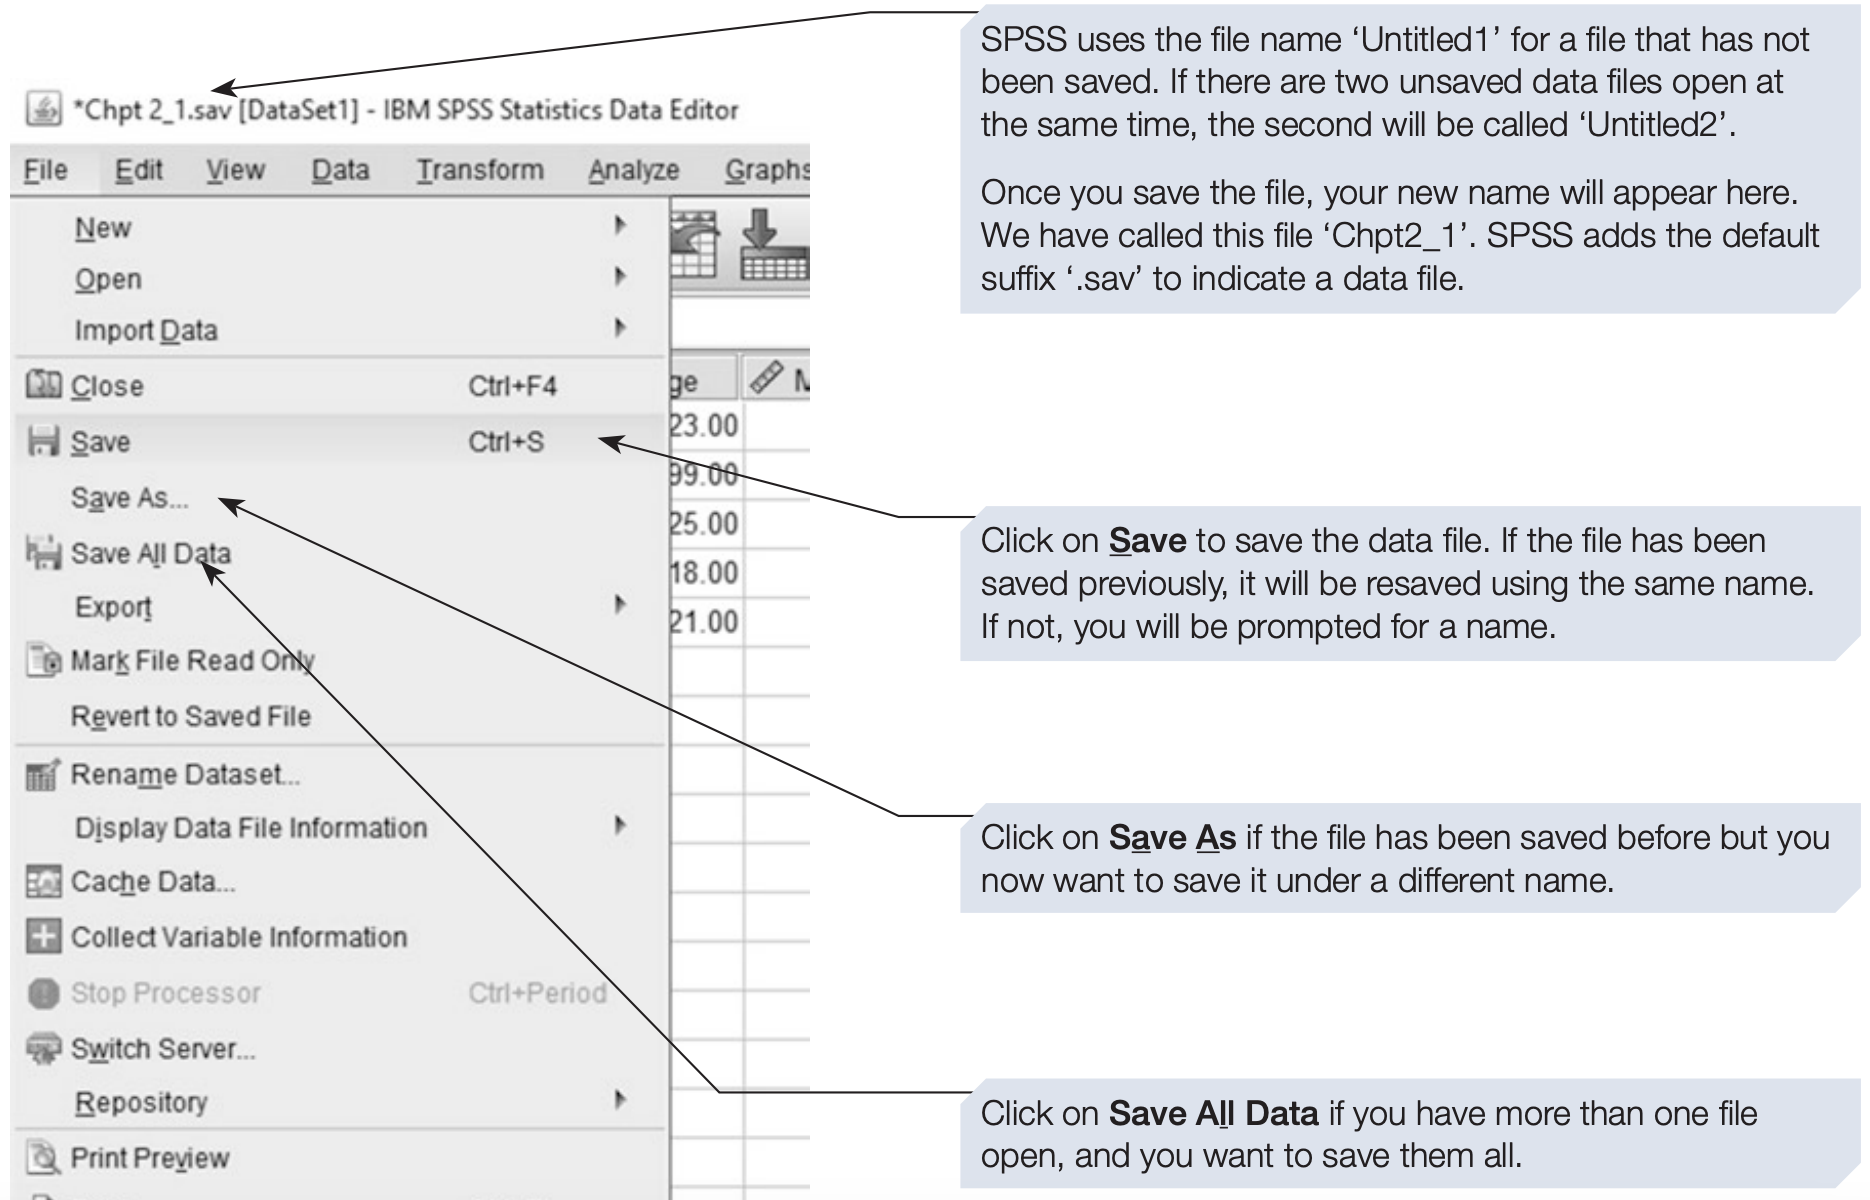
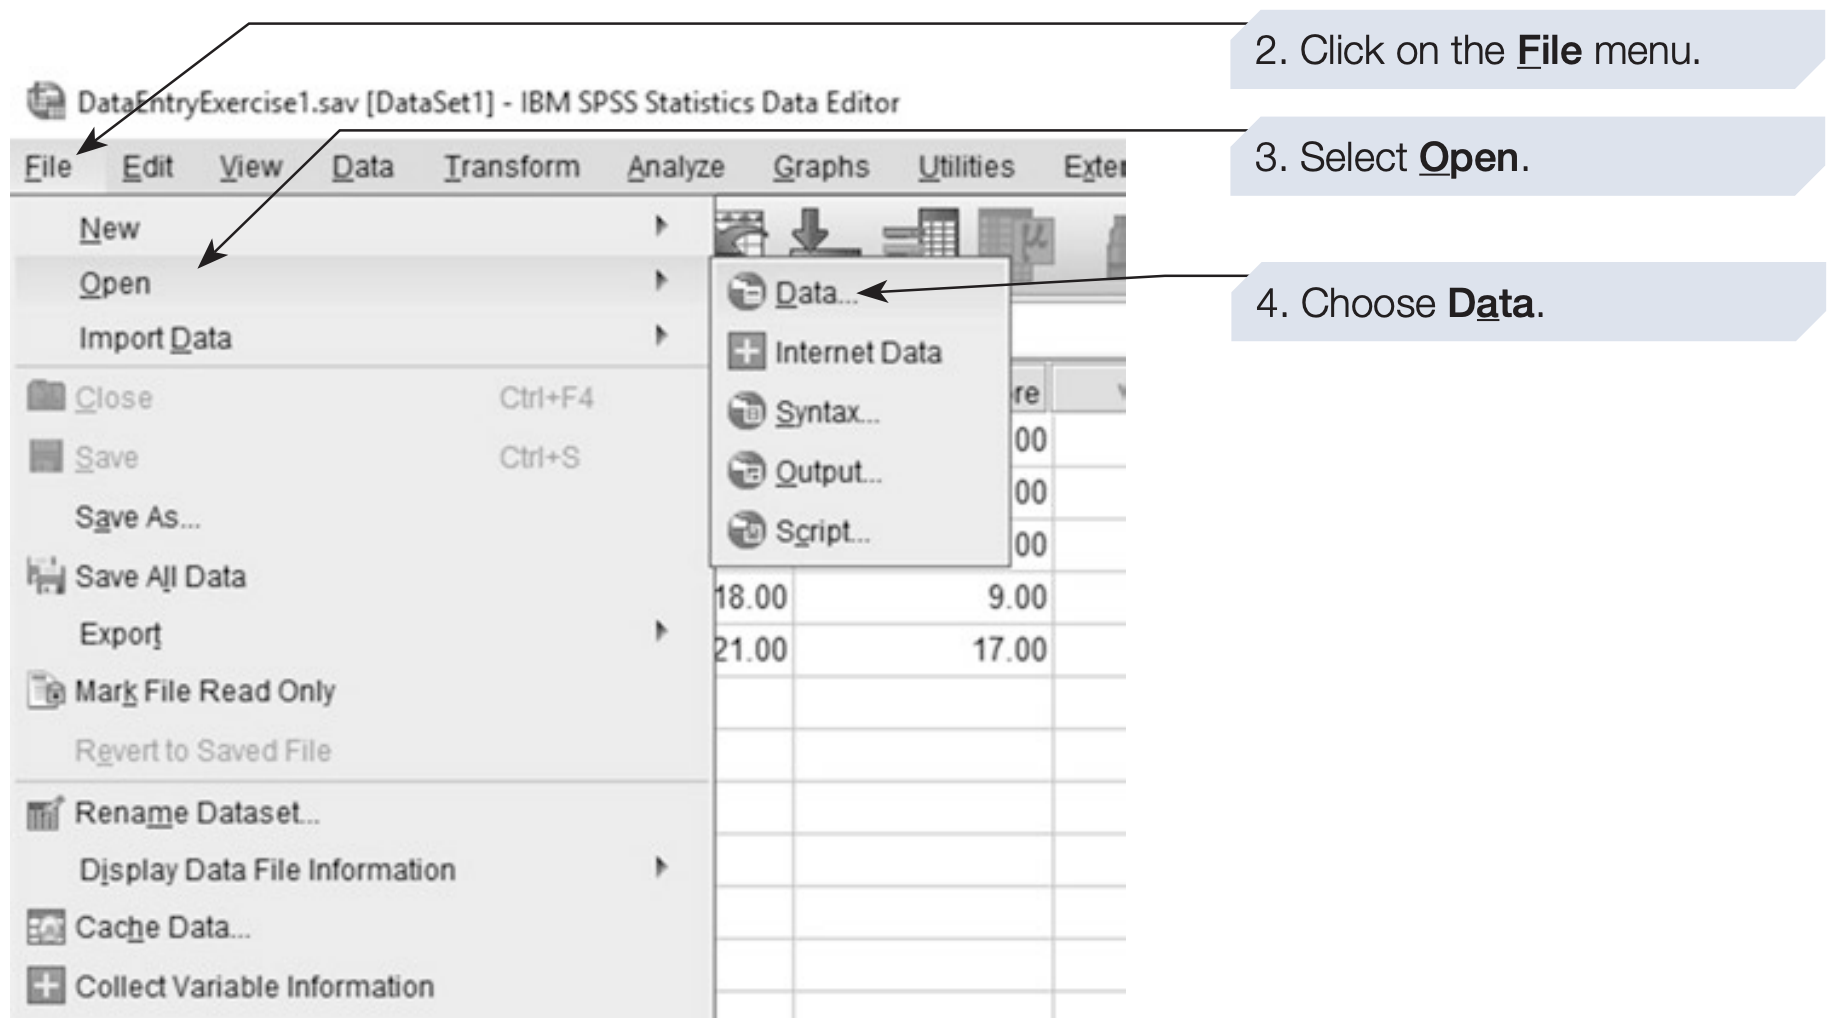
5. Opening a Data File
6. Data Entry Exercise
RODENTS IN SPACE: A SIMPLE MEMORY EXPERIMENT
Twenty-one first-year undergraduates participated in a simple memory experiment designed to investigate the effect of a mnemonic strategy on memory for paired words. The participants were randomly divided into two groups. All participants were given two minutes to memorise a list of 20 words presented in pairs. All the participants were told to memorise the words, but those in the mnemonic instruction group were advised to try to form a mental image to link the two words in a pair (e.g. for the word pair Rocket - Hamster, a participant might imagine a small furry rodent being launched into space). The participants in the other group, the non-mnemonic group, were not given this instruction. After learning the words for two minutes, the participants were then required to complete some simple mental arithmetic problems for two minutes. Finally, all participants tried to recall the words in any order. The number of words correctly recalled was recorded. The data are summarised below.
Memory scores (out of 20) for participants in the mnemonic instruction group:
\[ 20,18,14,18,17,11,20,18,20,19,20 \]
Memory scores (out of 20) for participants in the non-mnemonic group:
\[ 10,20,12,9,14,15,16,14,19,12 \]
Using these data, attempt to do the following:
- Set up an SPSS data file to record these data. Give appropriate names to the variables you are using.
- Apply value and variable labels where appropriate and specify the level of measurement and the missing values for each variable.
- Enter and check the data, then save the file using an appropriate file name.
- Ensure that you can reopen the file.
- Compare the data file you have constructed to the one illustrated in Section 7.